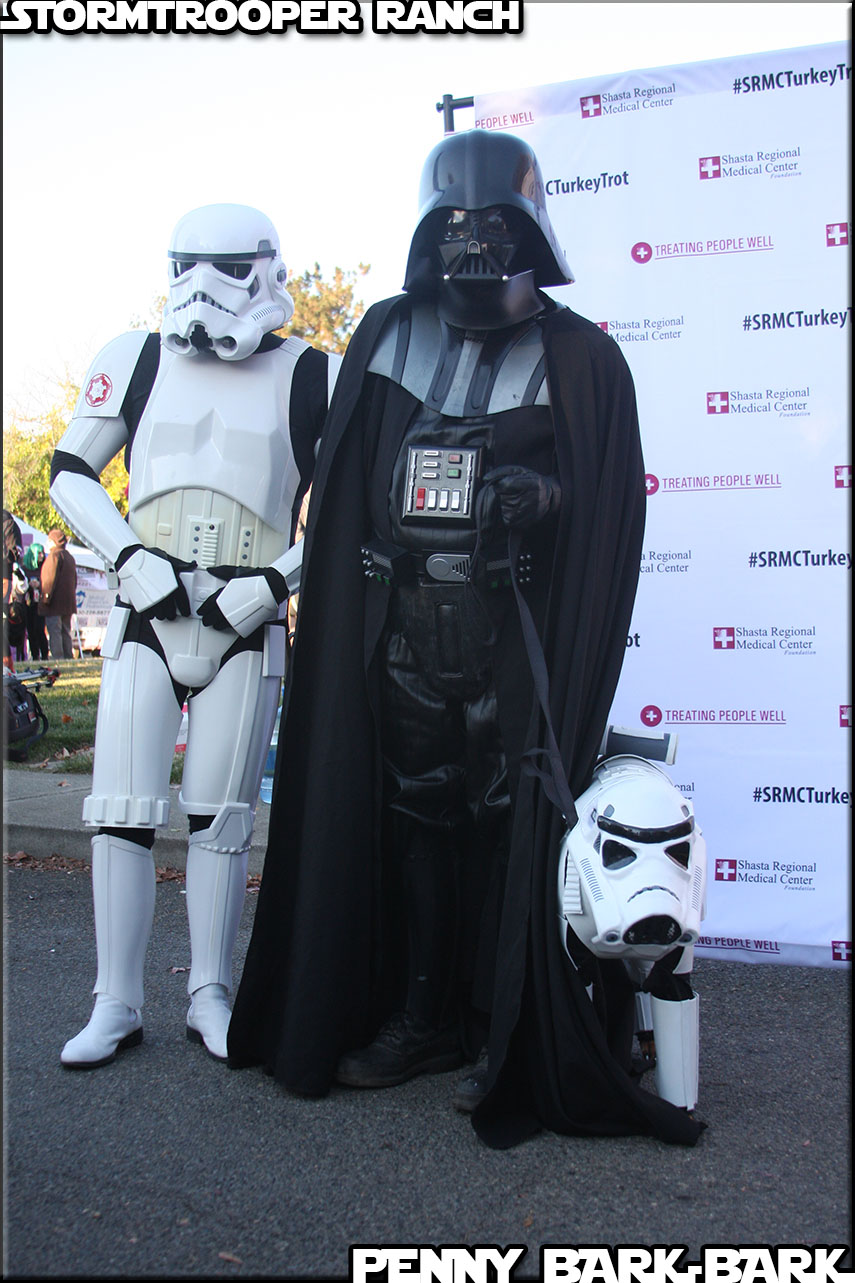
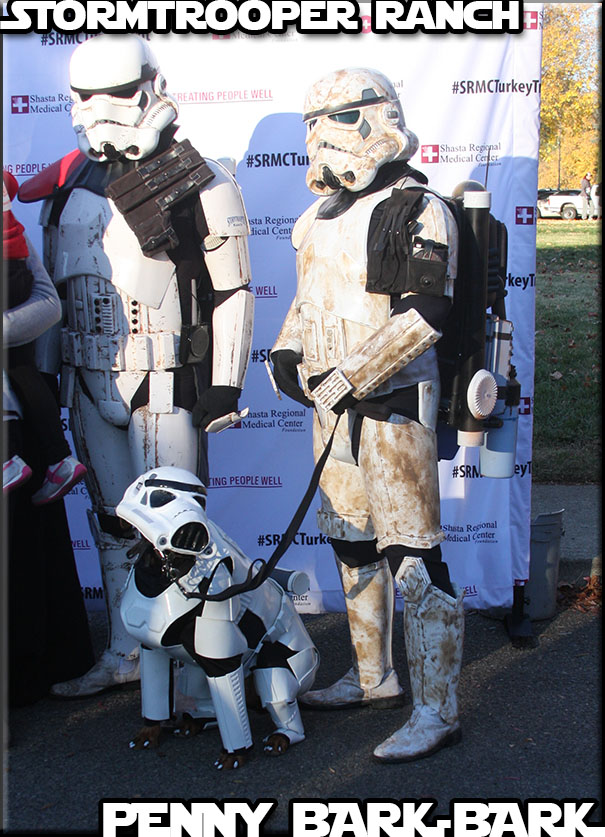
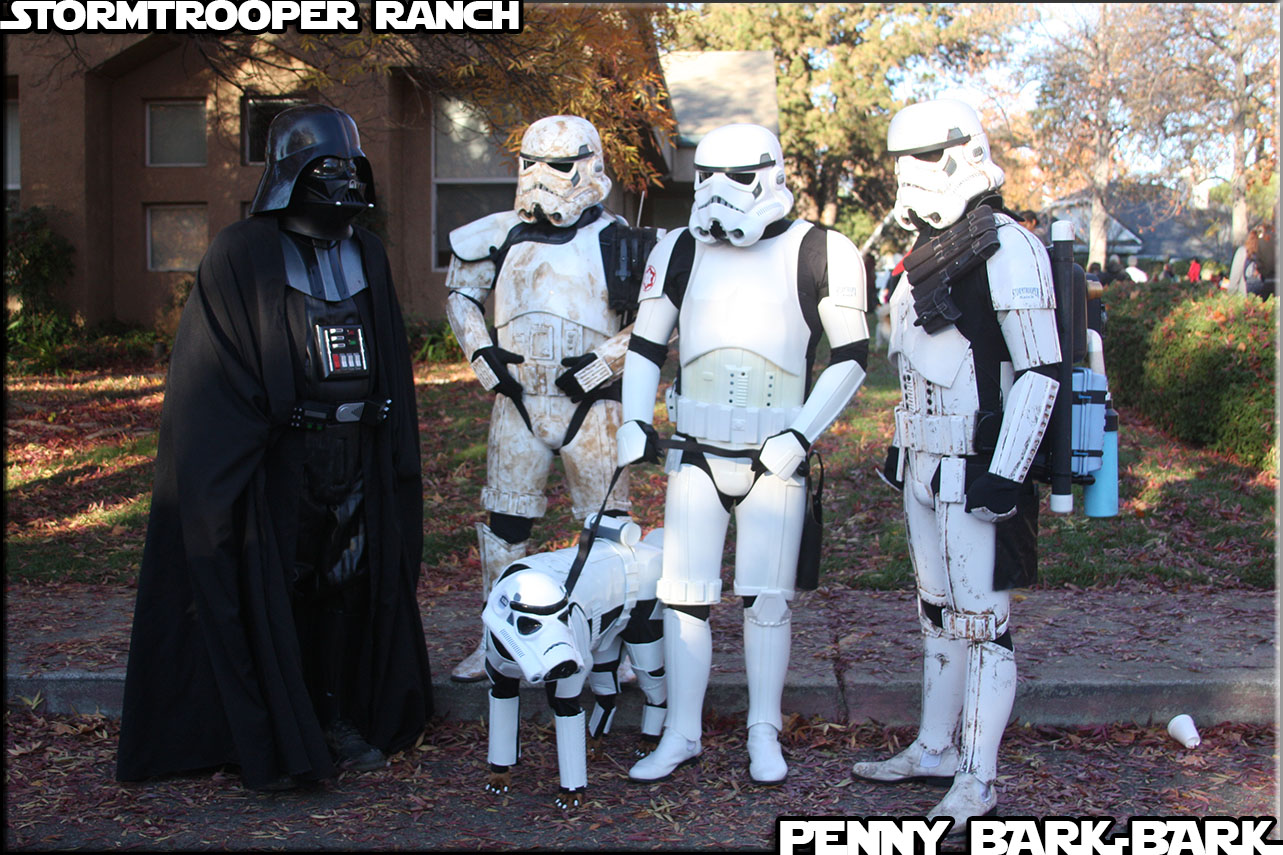
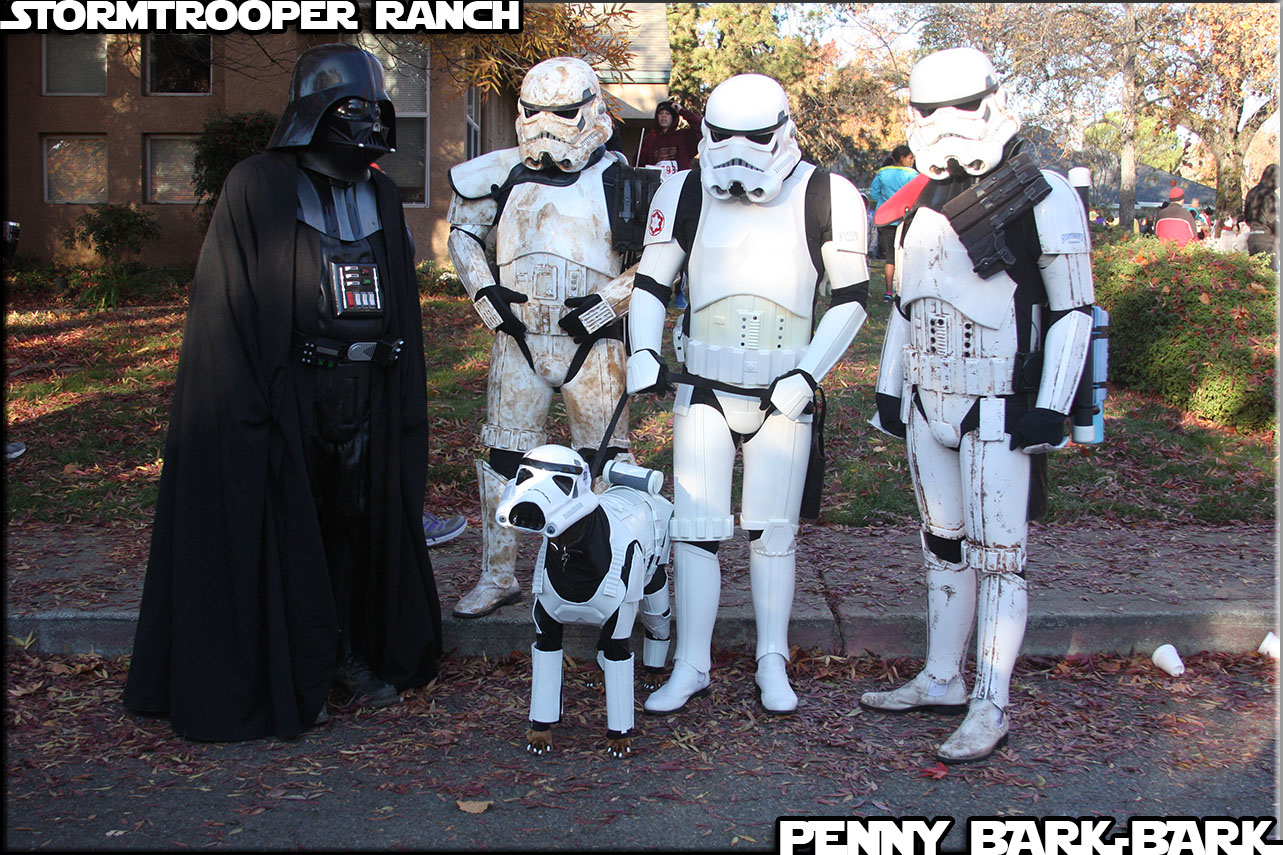
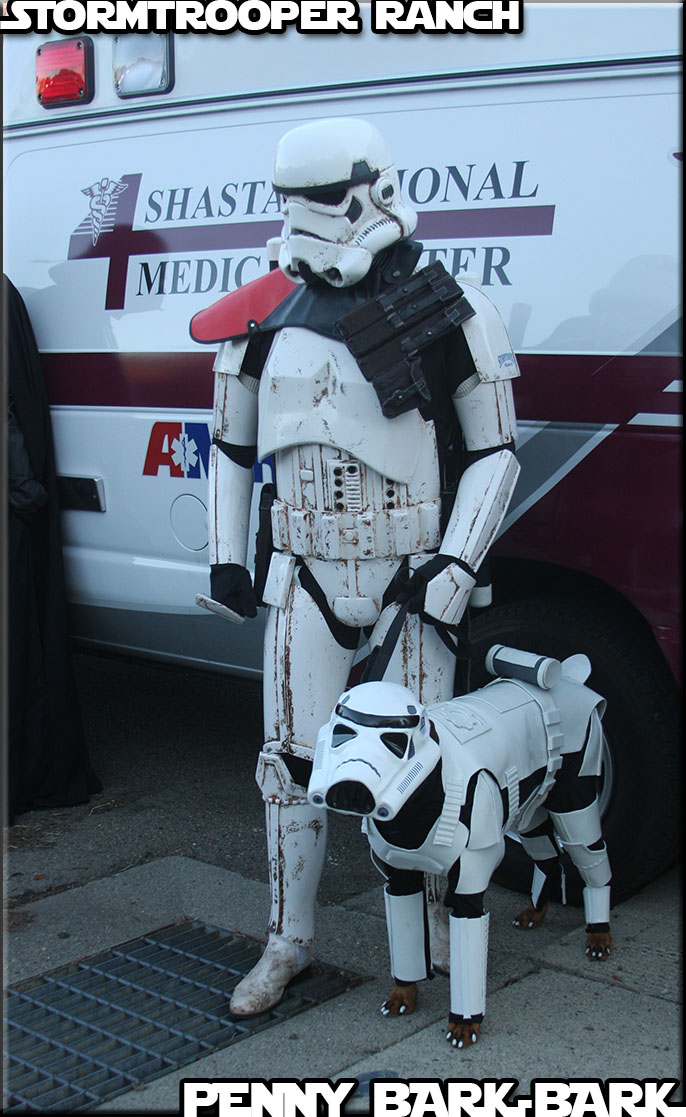
It’s been a while since we had time to post any updates/reviews but with the recent news articles making their rounds I wanted to clarify a few things.
First, Mom’s name was spelled wrong, so if you look up Sabrina Ridley, you wont find her. No biggie though because she prefers people just contact me directly on my Facebook page.
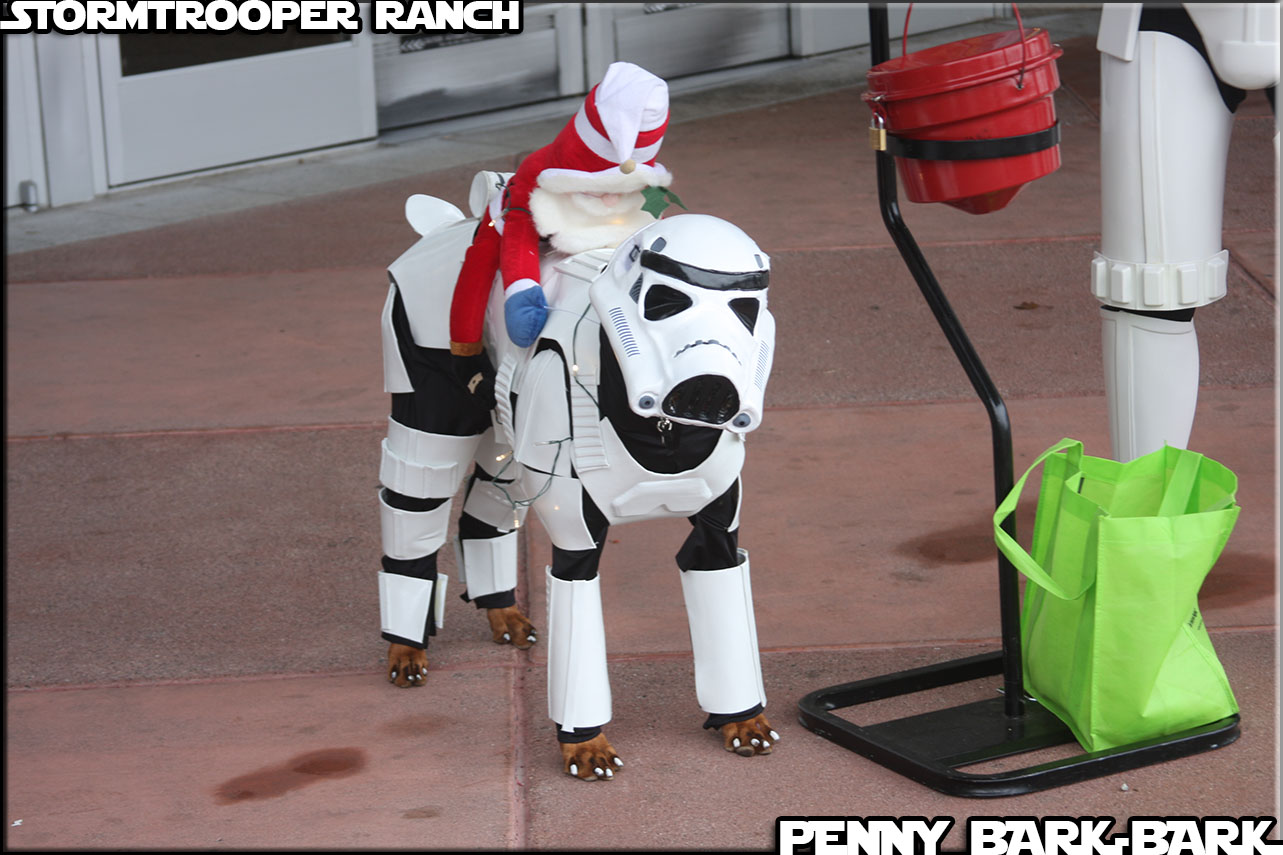
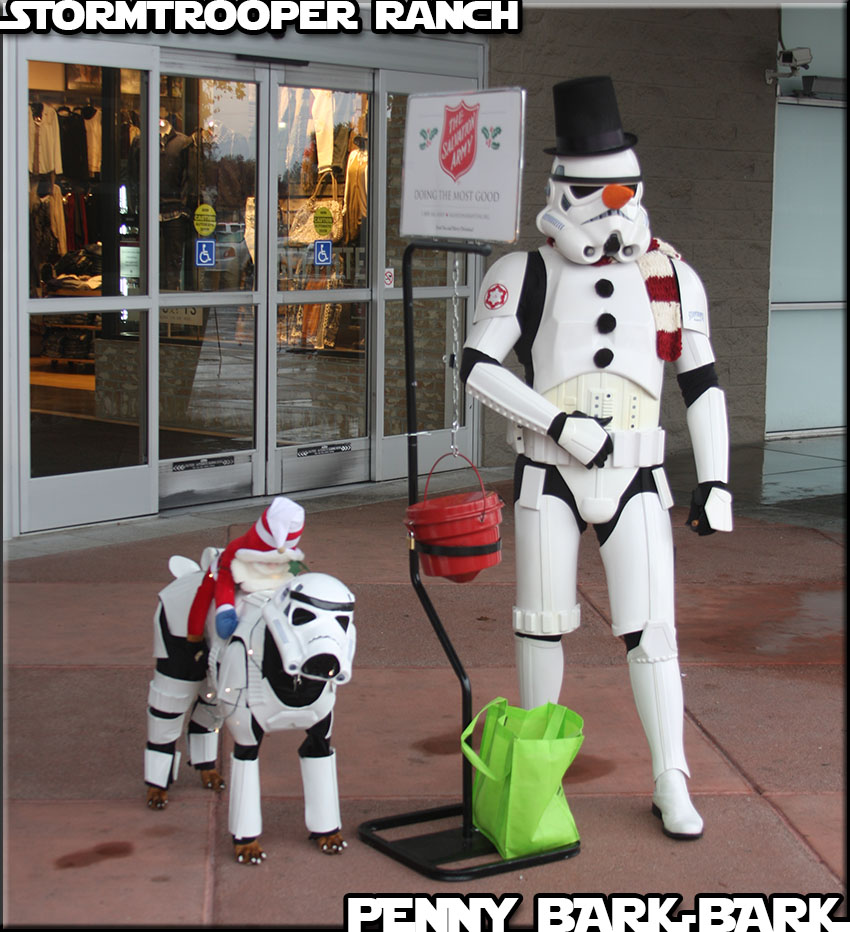
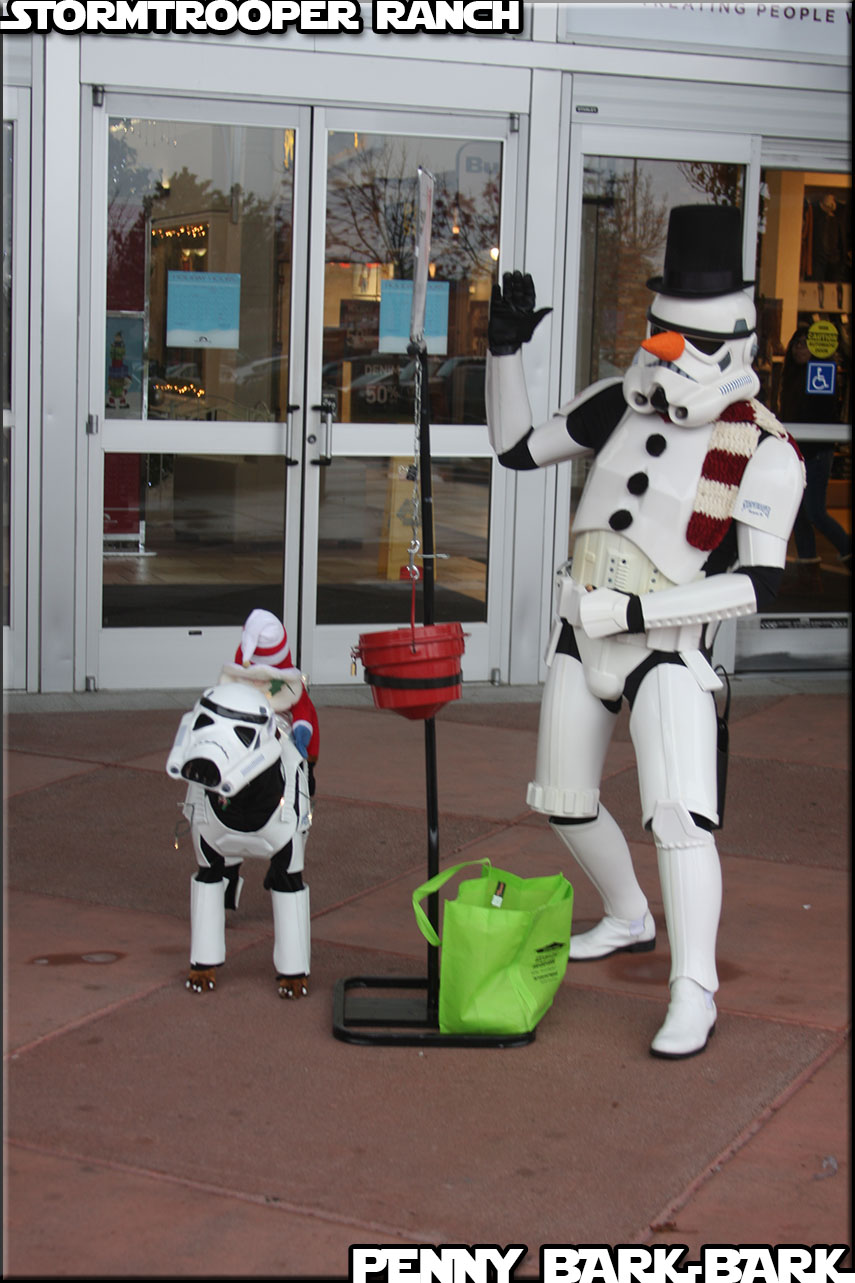
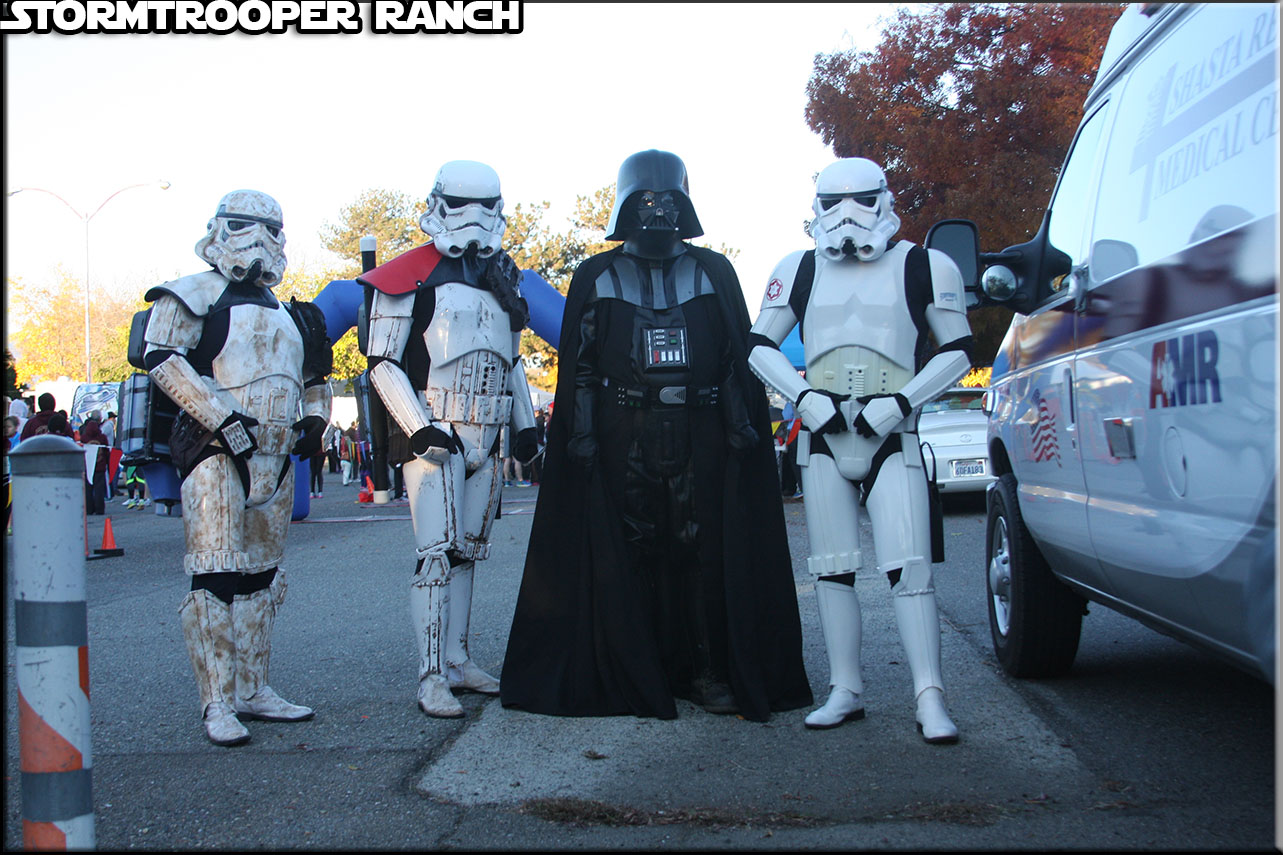
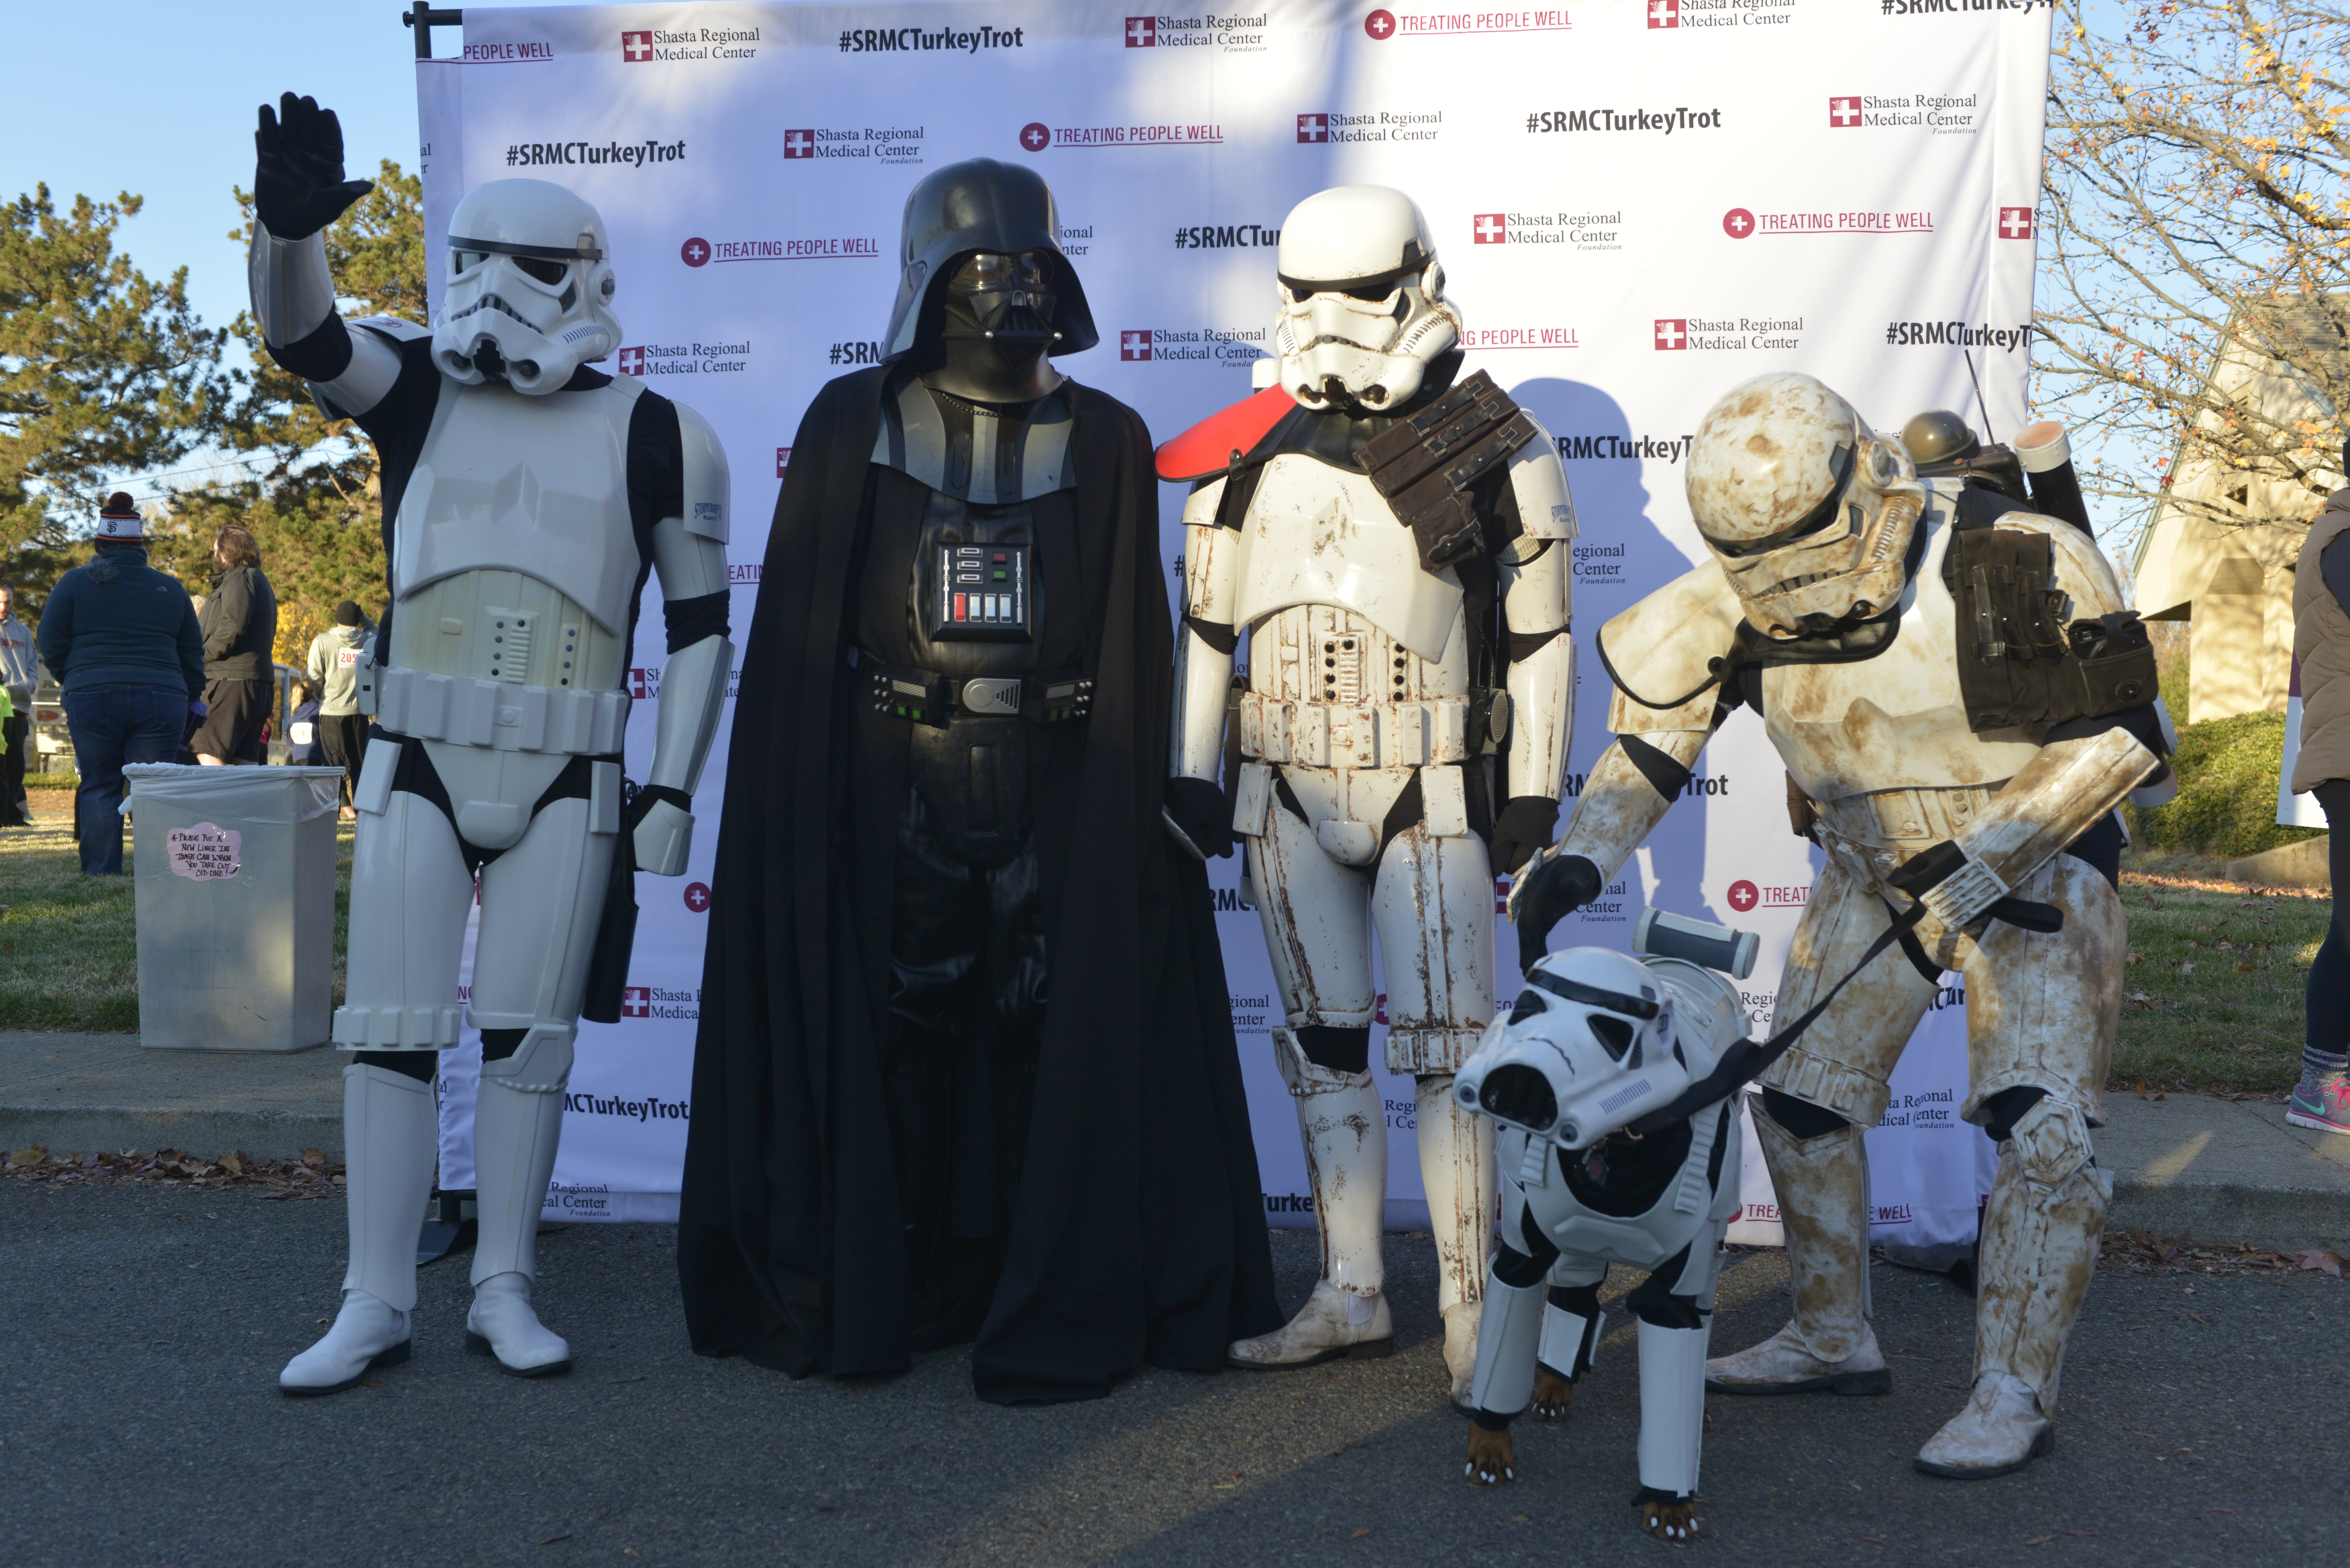
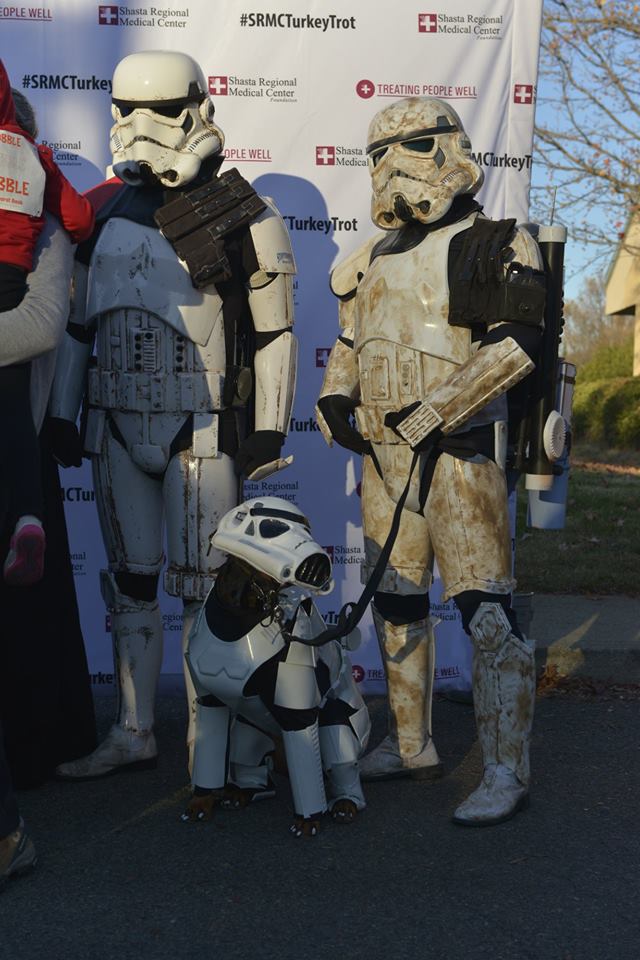
Second, it says Stormtrooper Ranch collects money for charities, they do not. We simply make appearances for charities/non-profits. Information on Stormtrooper Ranch can be found here: http://stormtrooperranch-theoneandonly.com/. If you are looking to have Stormtrooper Ranch to come out to your event go ahead and contact them through the information on their website. I can’t always make every event and I won’t be doing events once it gets hot out (unless I am invited to an air conditioned building). If there aren’t any members near you, you can try the 501st, they are much larger and do the same things for non-profits.
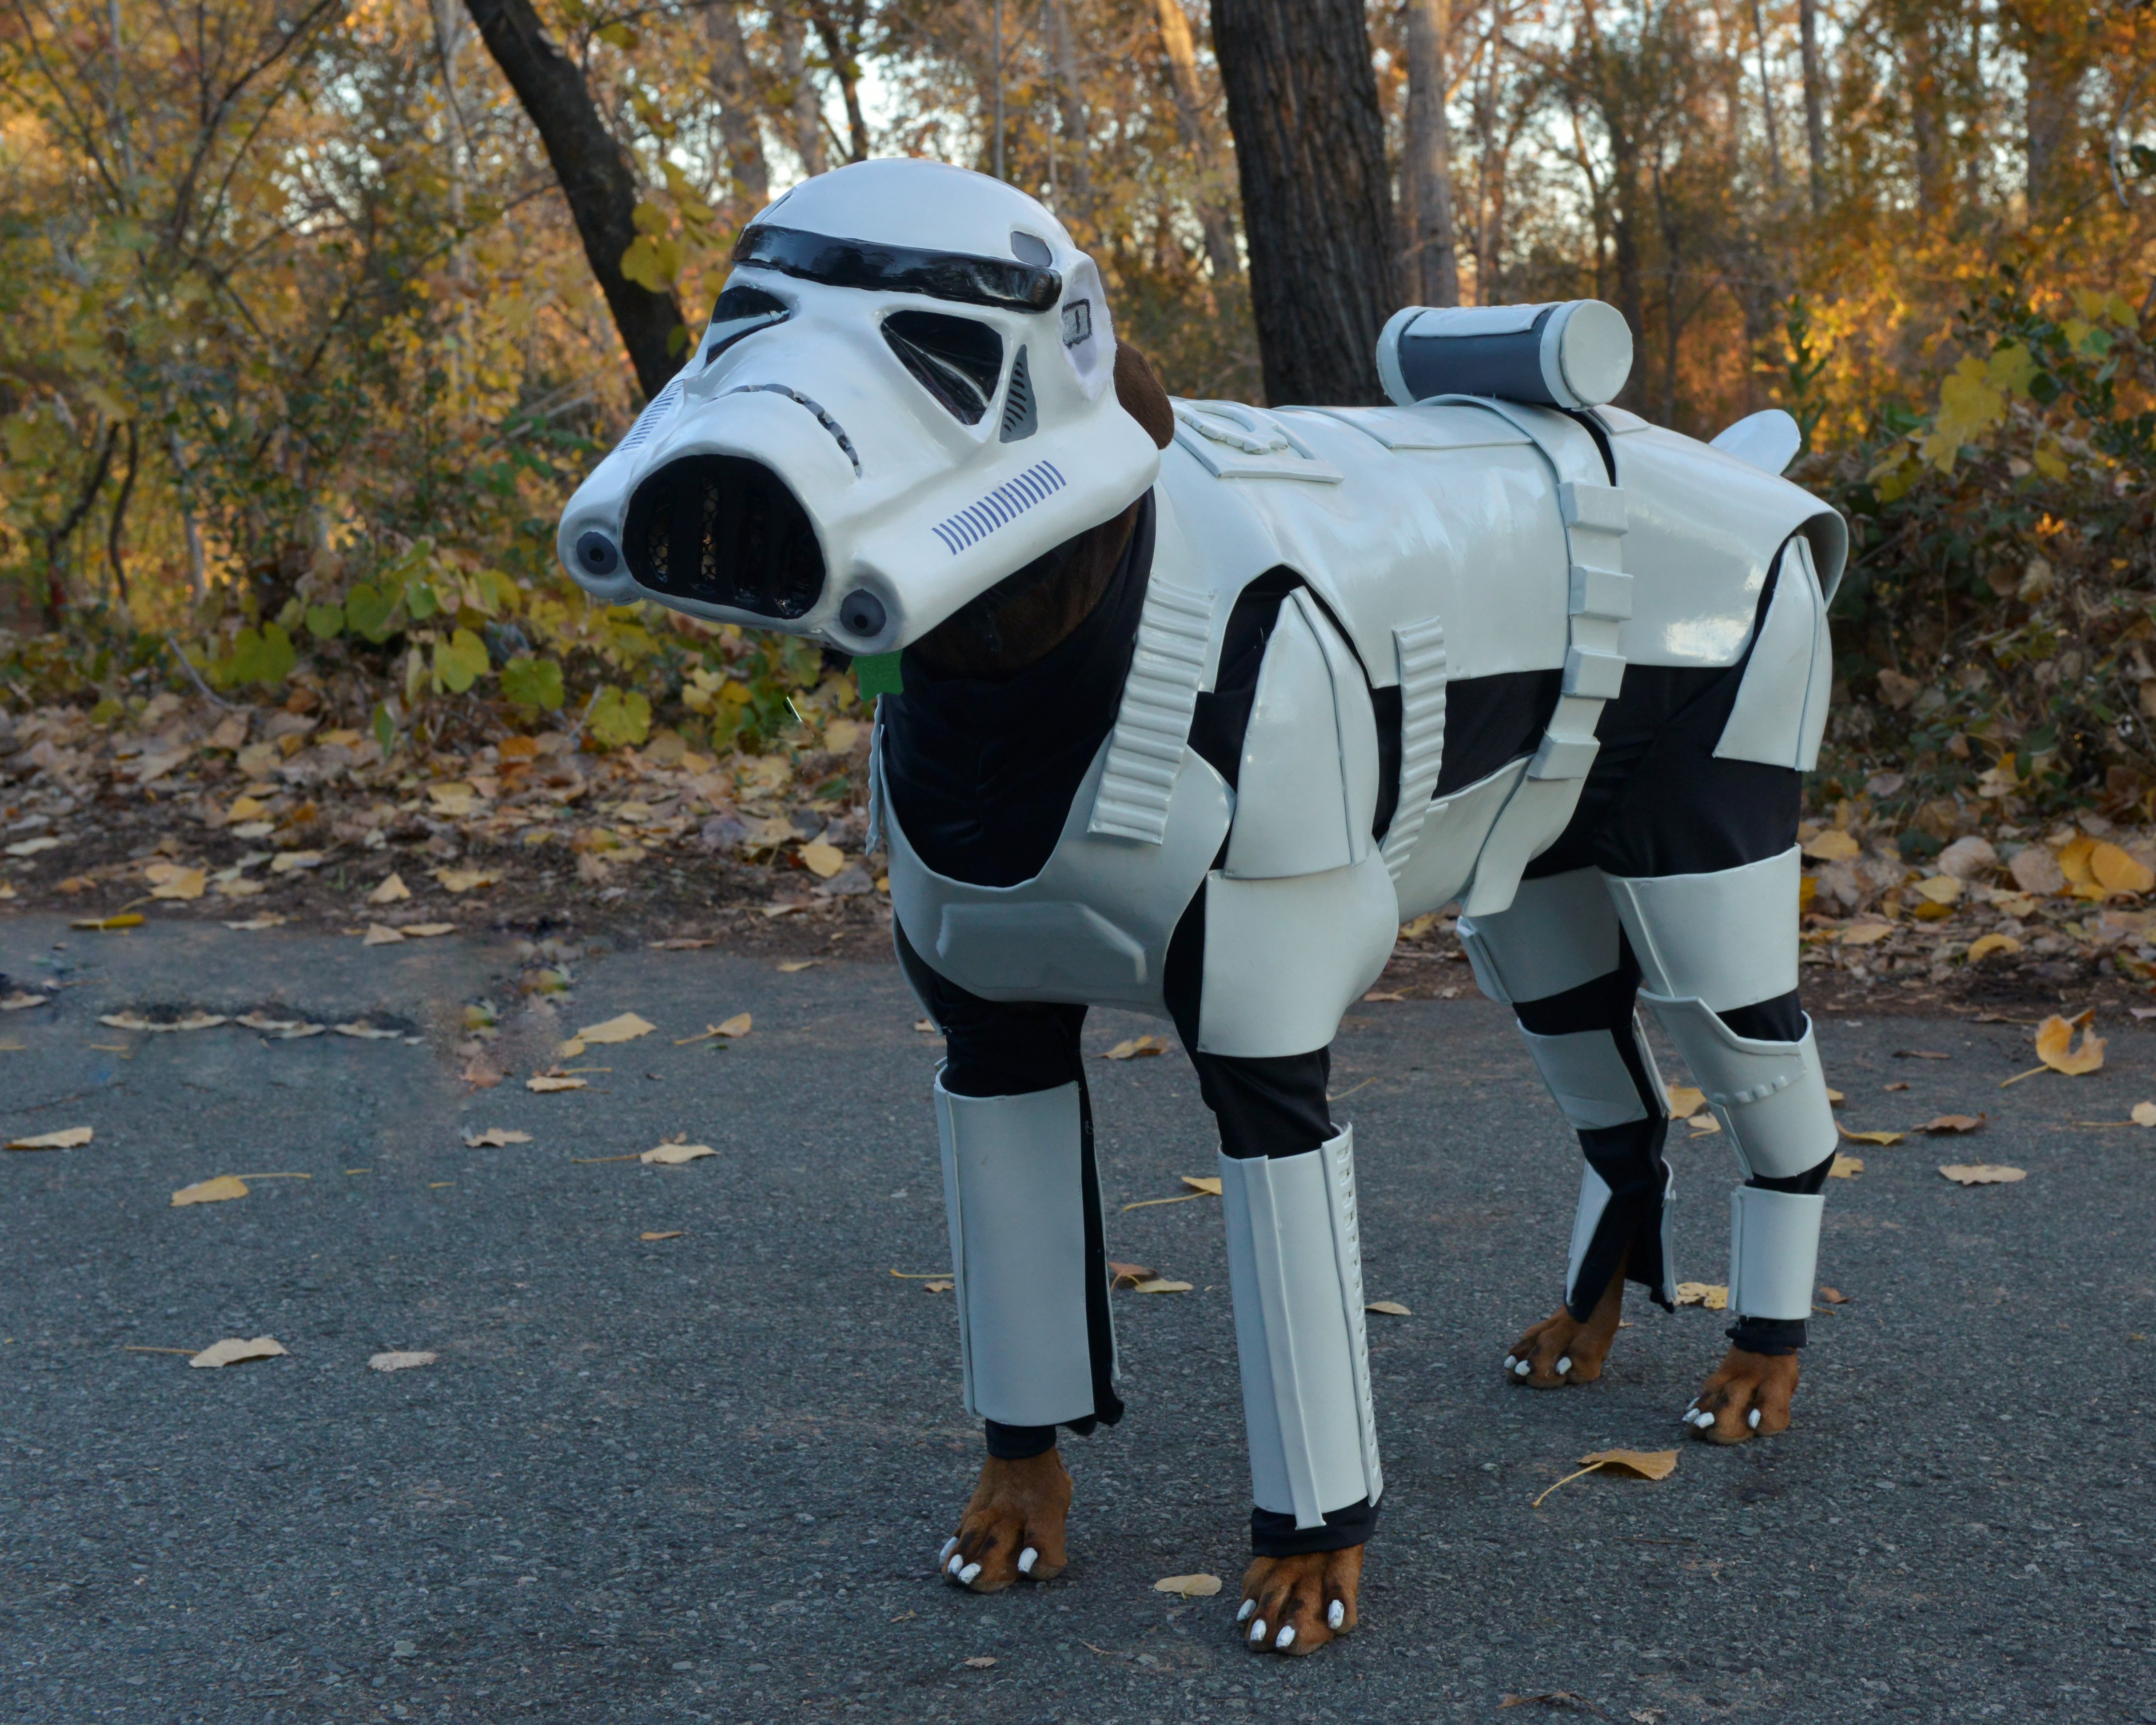
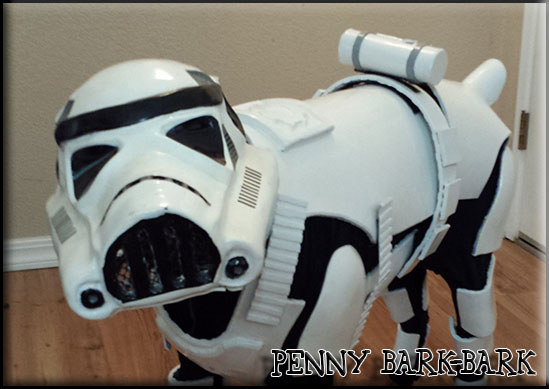
Now some other notes, the article make it sound like Mom fiberglassed my head, there was a lot more to the process, but the fiberglass cast (like they use to set broken bones) was used to make a thin base to put the clay on. More information on the helmet build can be found here: Stormtrooper Helmet Build – Doggie Style!
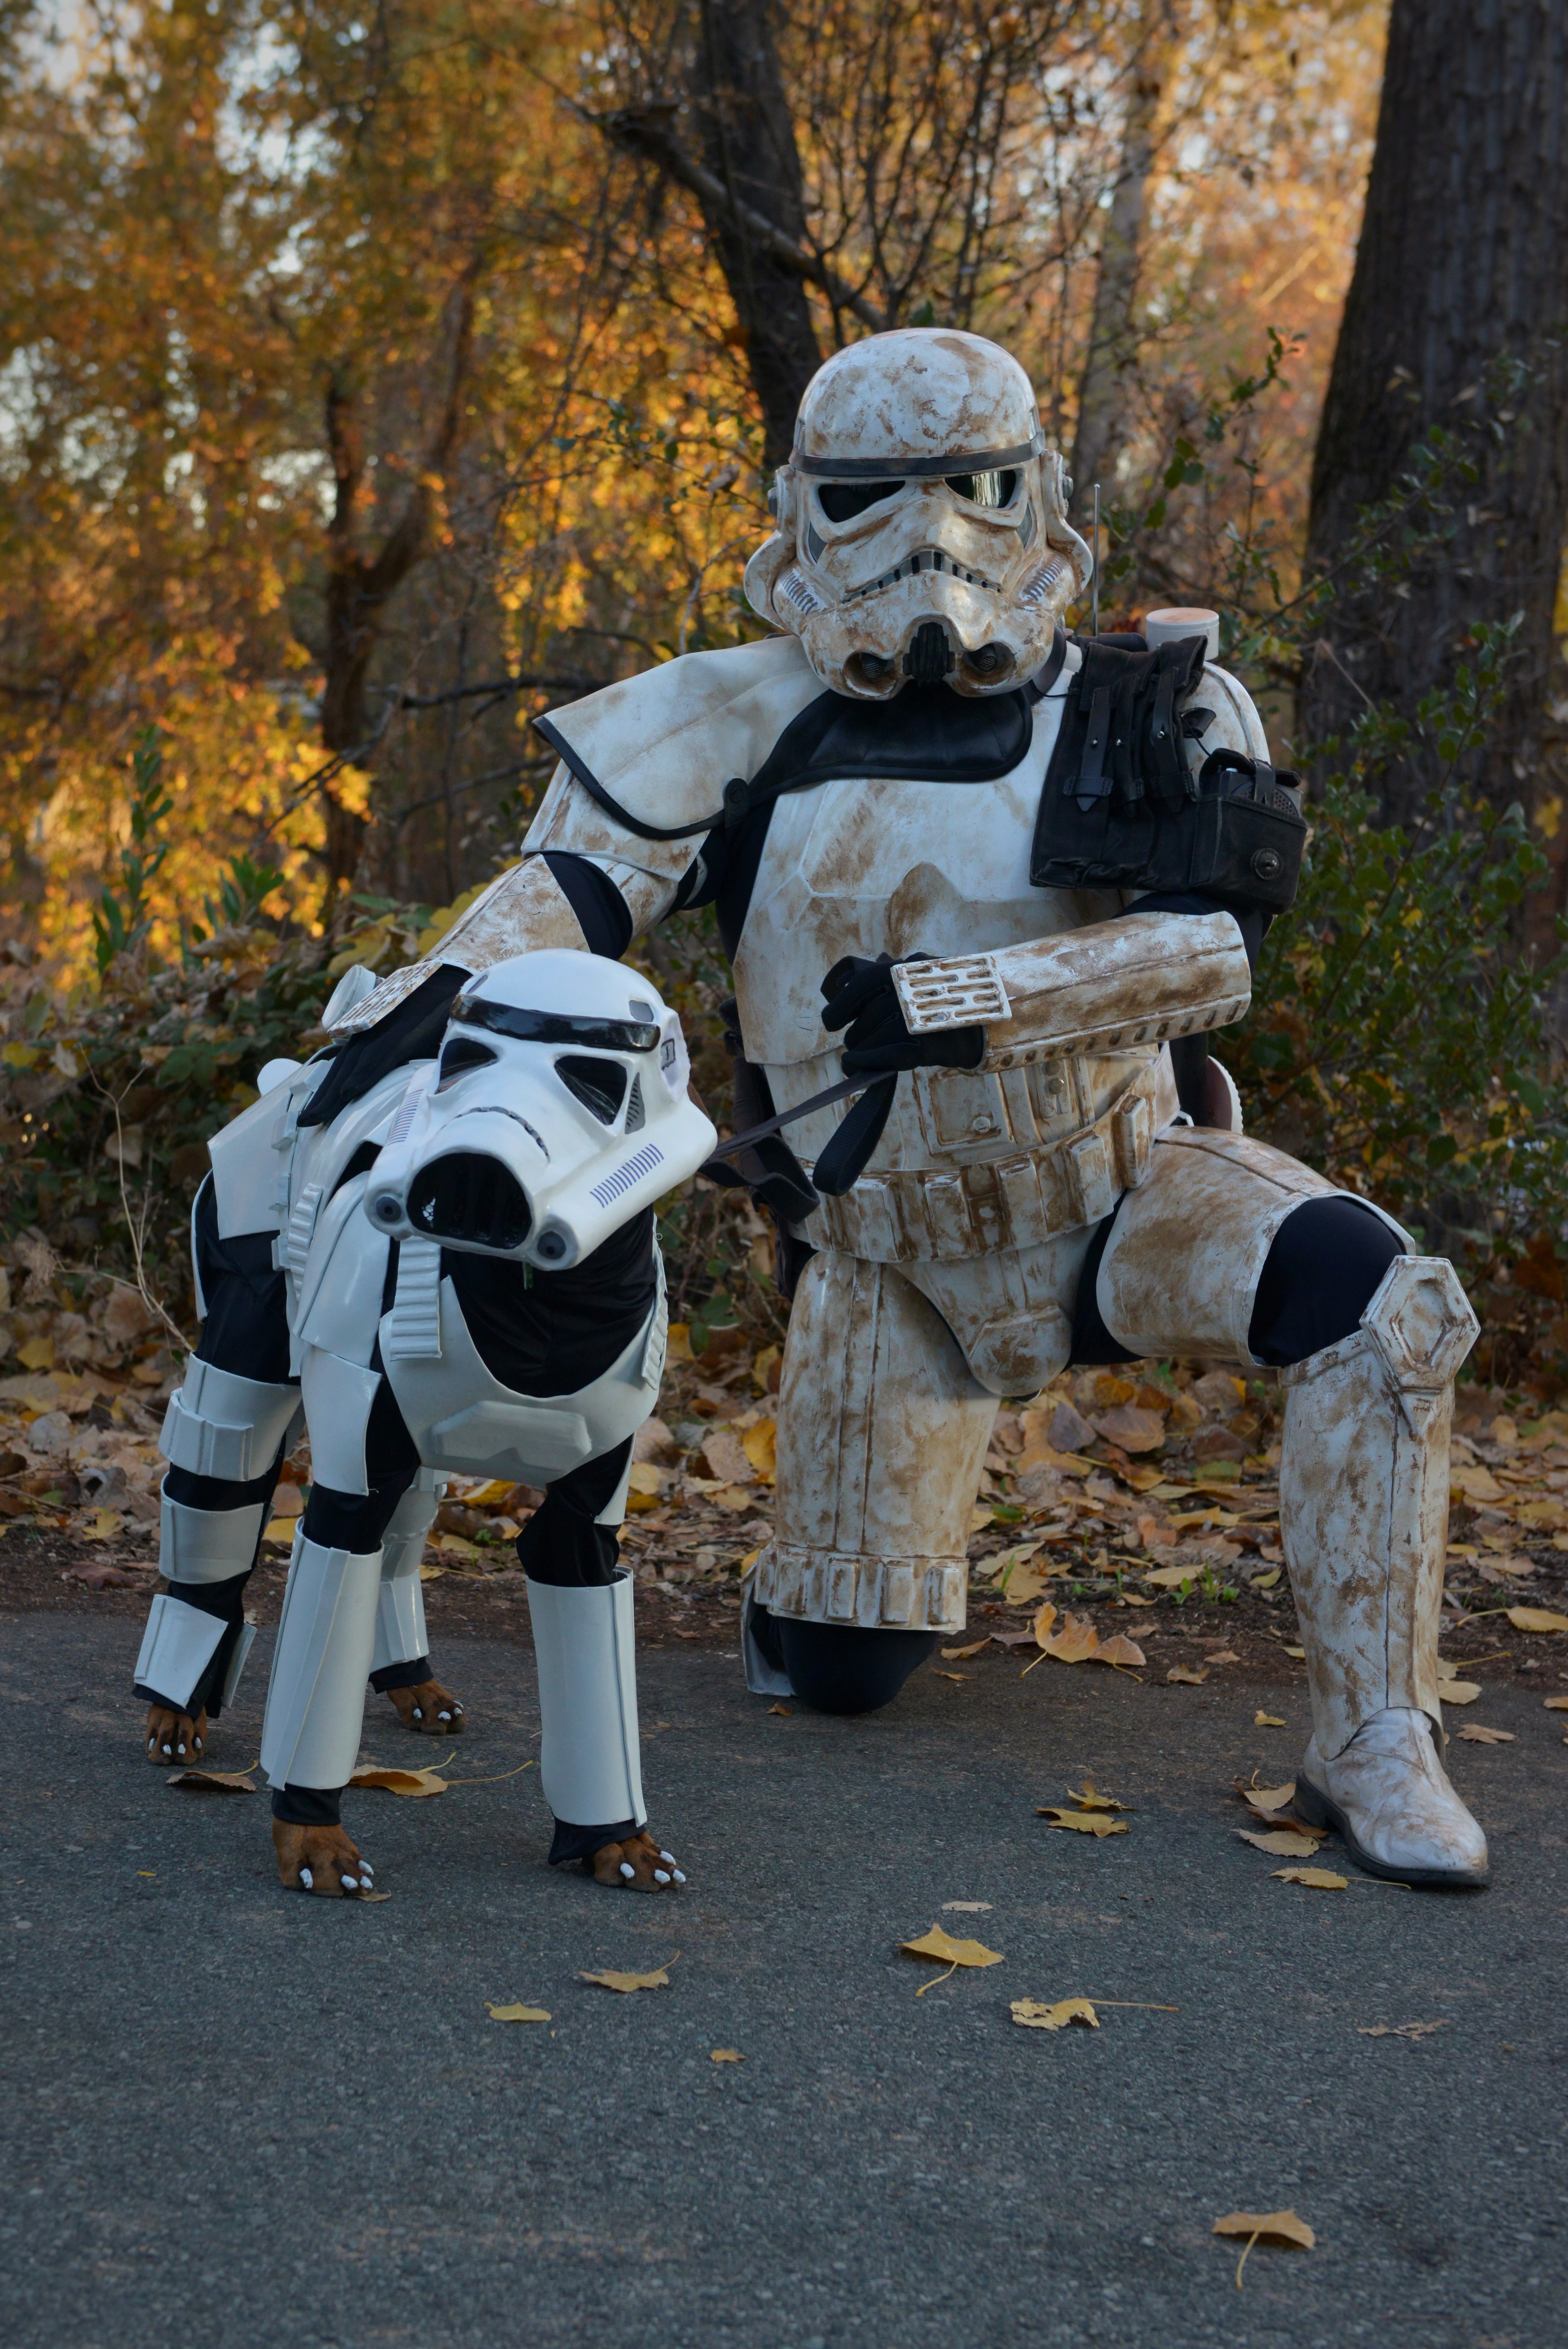
For those of your that say this is cruel I will have you know that this helmet was specially made for me and if I didn’t want to wear it, I wouldn’t (ask anyone that has tried to trim my toenails, it’s a circus event). I certainly wouldn’t be wearing it to charity events and events held my the humane societies. If I do want it off, I just tell Mom and she takes it off (making the human Stormtroopers jealous). If I need to take a break, I get to, Mom event has a whole travel kit with blankets, treats, and water. I can sit down, lay down and go potty in my costume if I need to and can quit at anytime. Then what do I get out of this? Besides all the attention, people talking to me, petting me, I would say I loved the moment two little girls came up to me at an event then gave me big hugs, well it was more than hugs, for a minute I thought I was going to have to take one home since she wasn’t letting go. Then Mom loves that people stick around and talk, so they are more likely to help the charity we are helping.
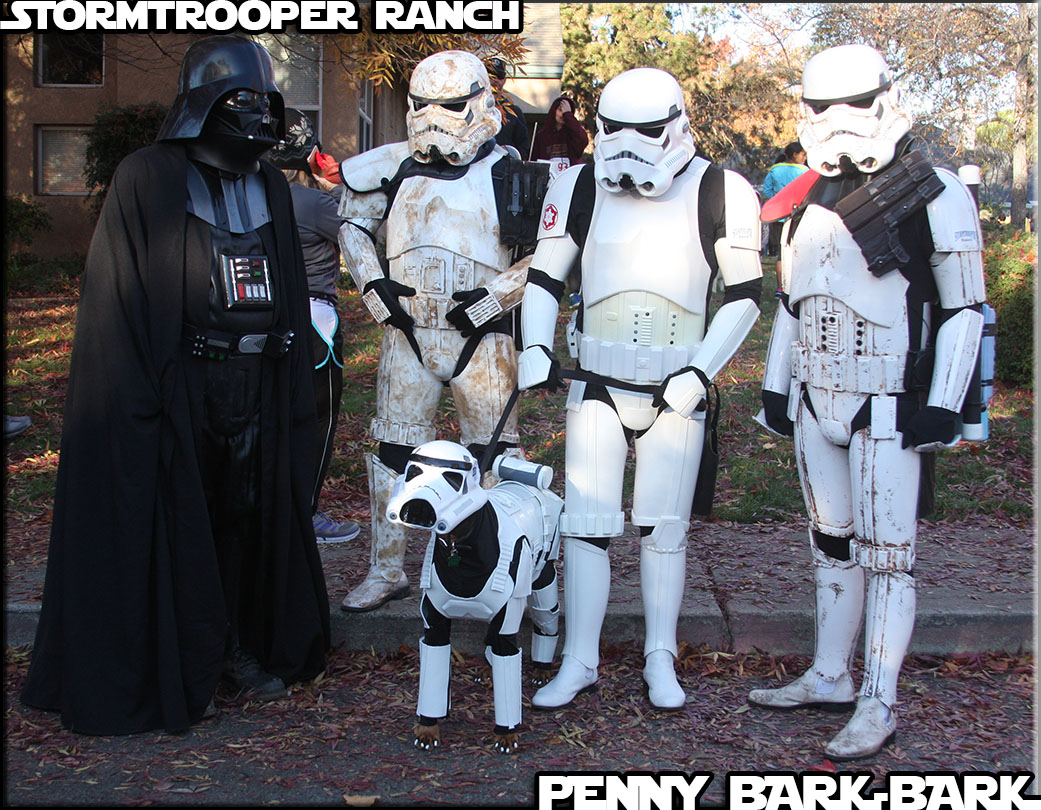
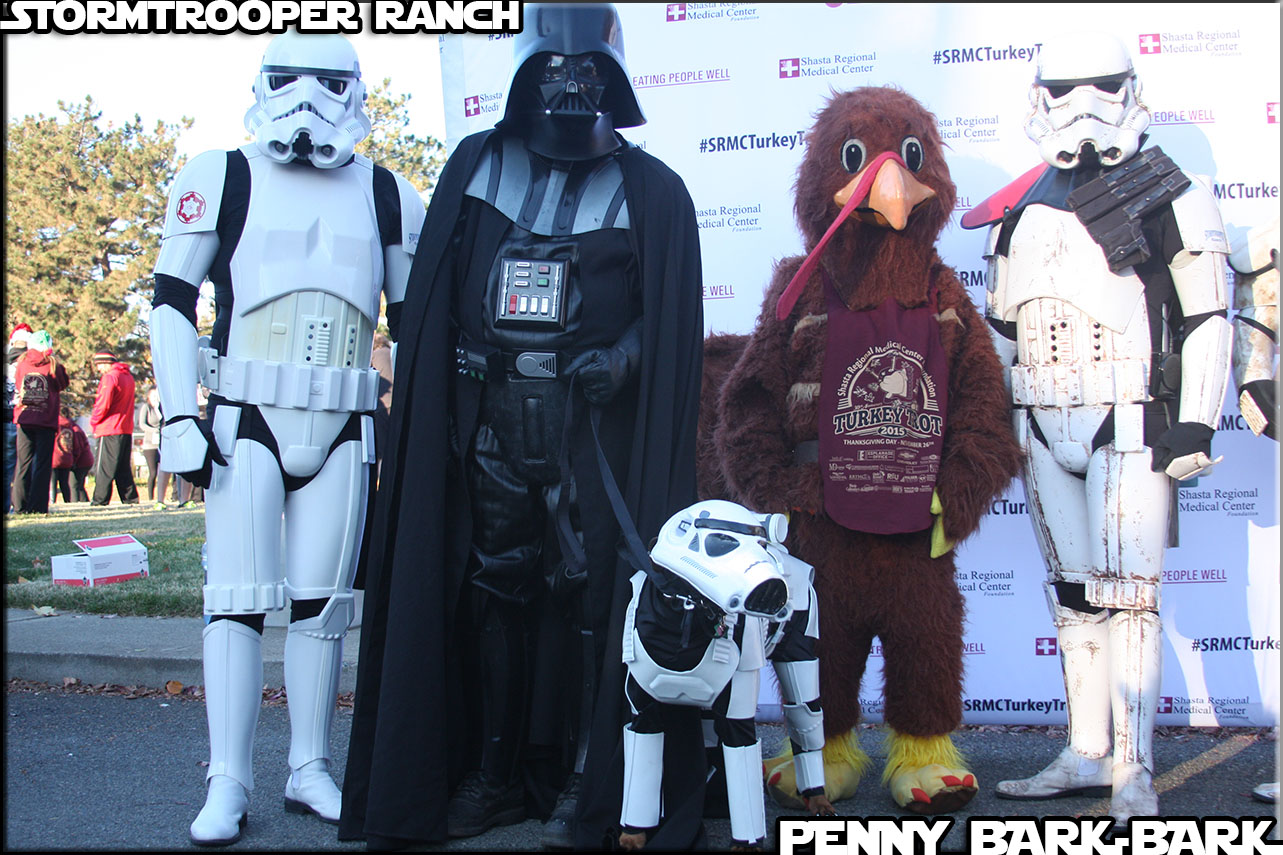
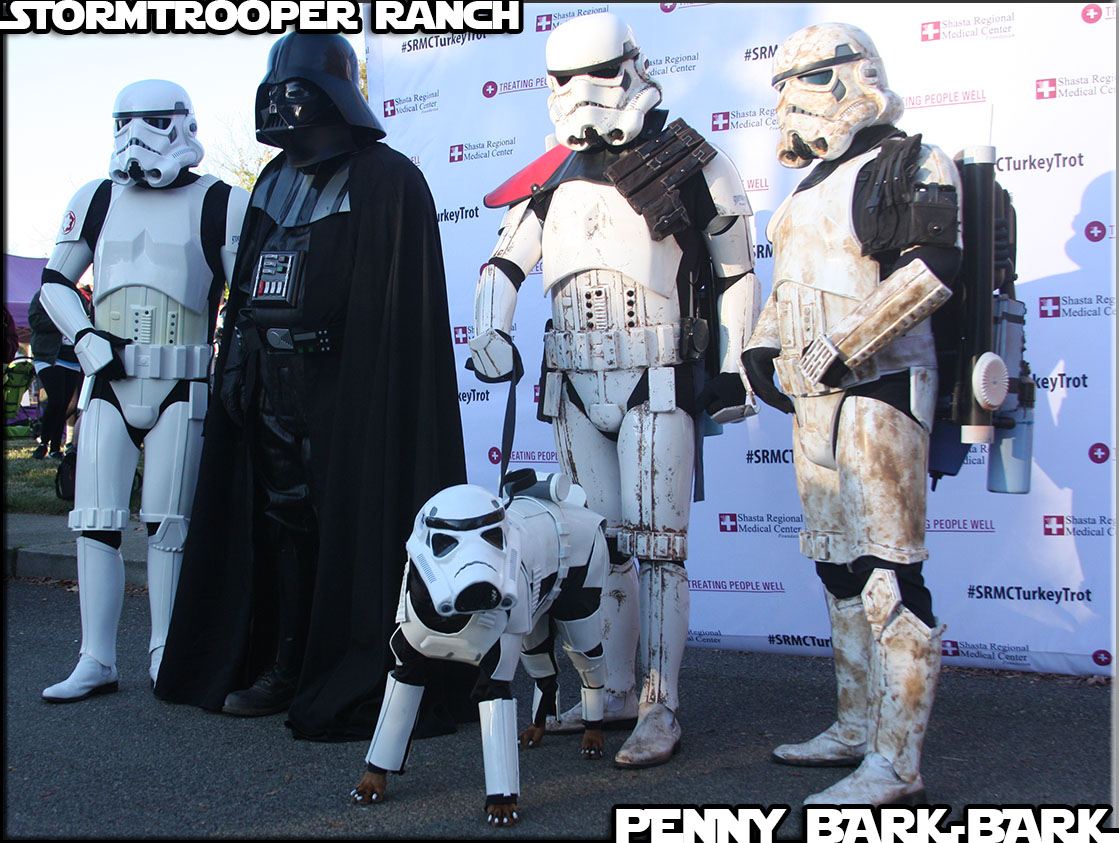
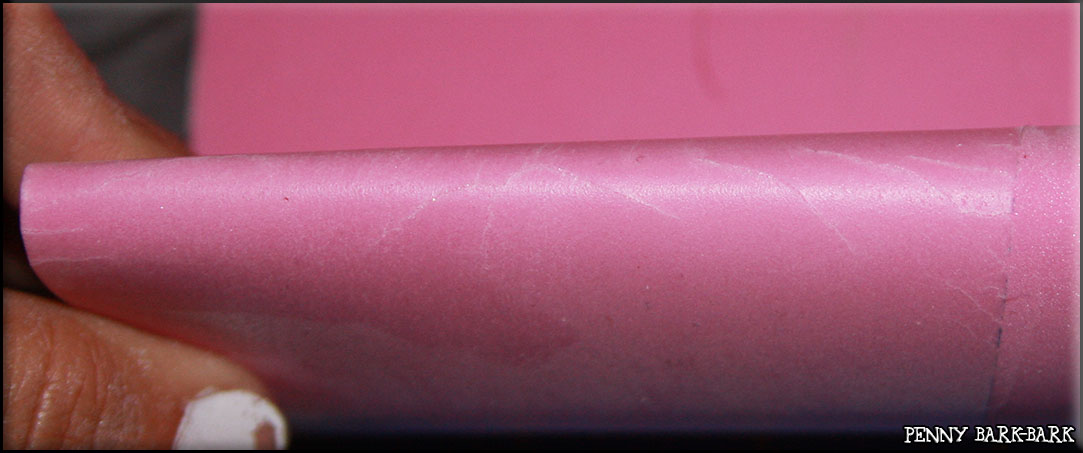
I think I need to write up a tutorial on the suit and my next helmet build, but until then here are some more pictures for your enjoyment.
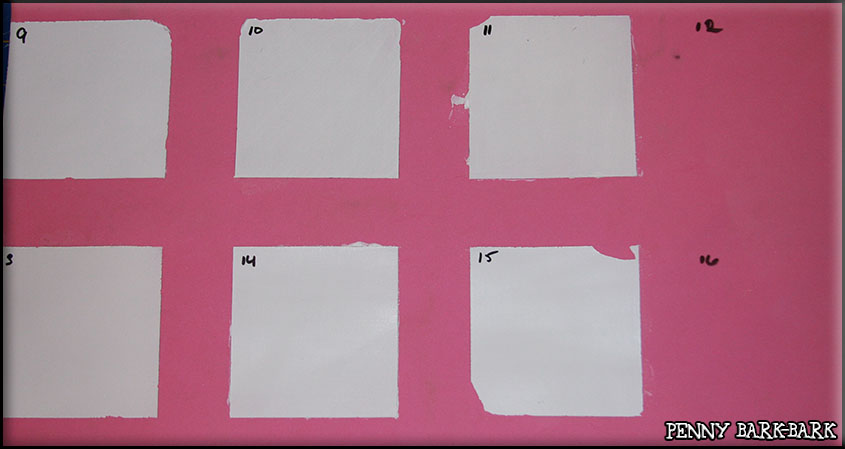
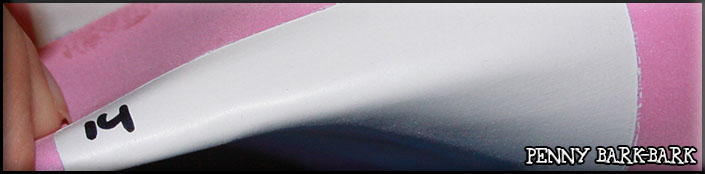
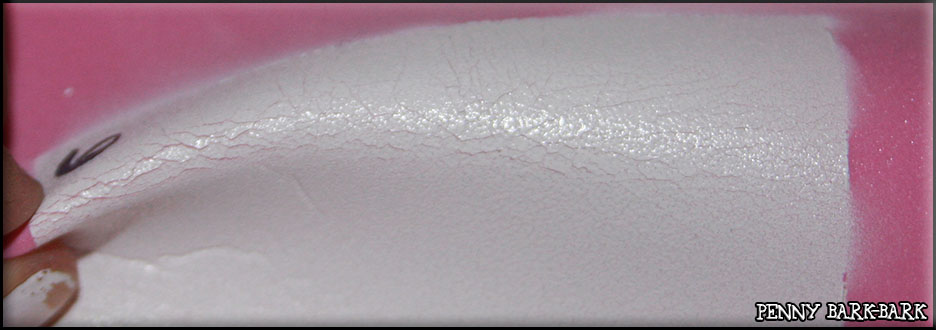
15. Adhesion Promoter (3 layers), PVA/Latex mix (4 layers) then Vinyl and Fabric spray paint.
16. Unused.
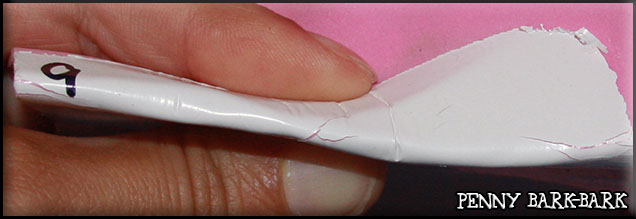
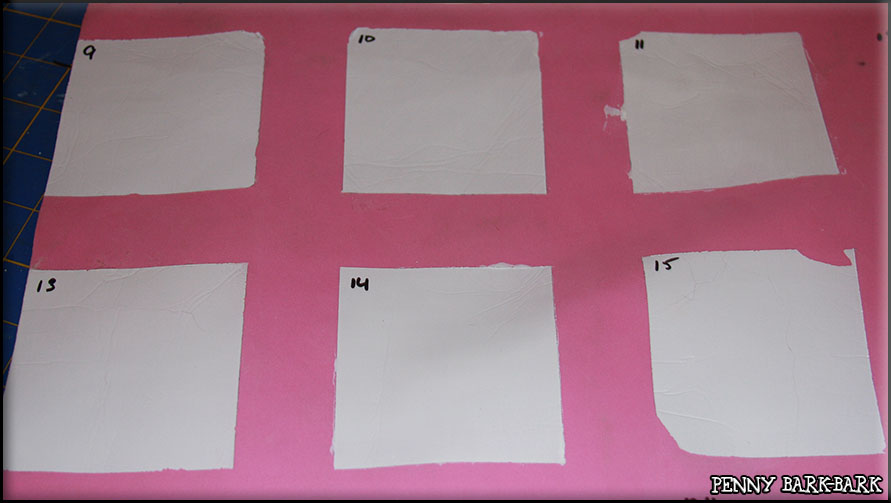
9. PVA/Latex mix (4 layers) with Vinyl and Fabric spray paint.
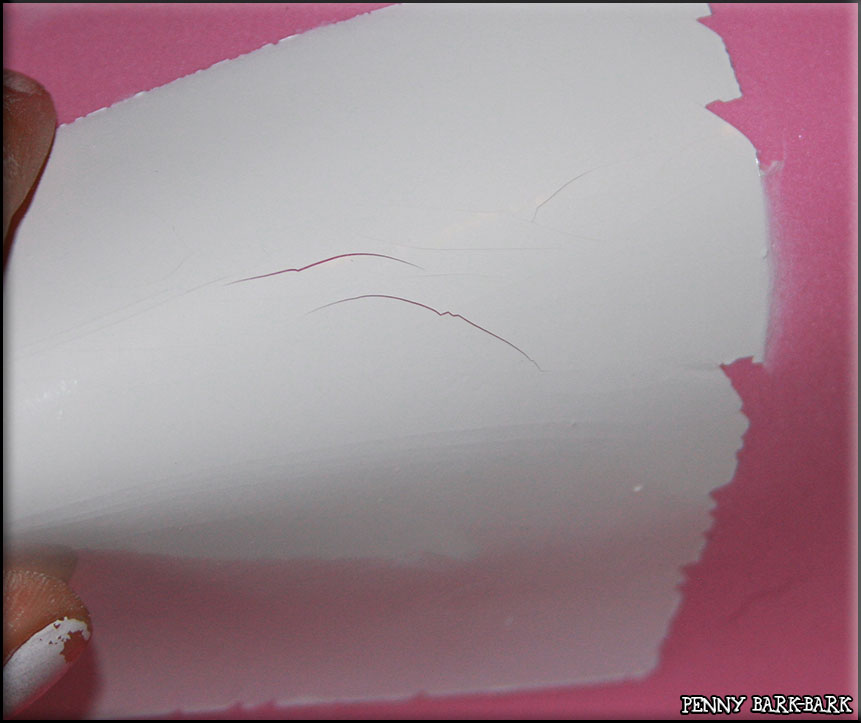
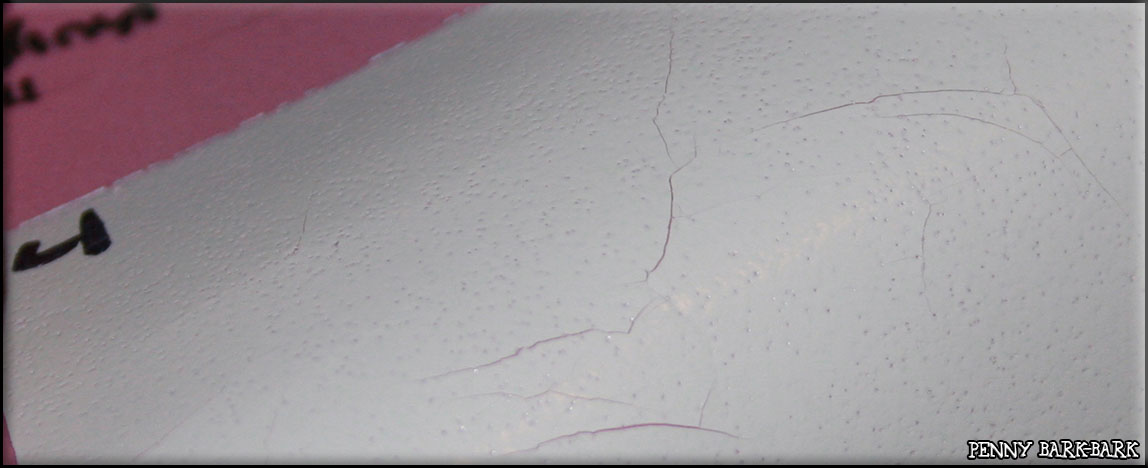
When removing the masking tape I had a bit of paint peel and the pinch test showed cracking. Crumple test left marks also.
10. PVA/Latex mix (4 layers) with acrylic paint.
Slight peeling when the masking tape was removed, but NO cracks and of course the crumple test left marks (that is pretty much a given no matter what you do)
11. PVA/Latex/Acrylic mix (5 layers).
After really pinching excessively I did get some cracking, but we had to really keep going to get that to happen. A little peeling when masking tape removal and same results on crumple tests.
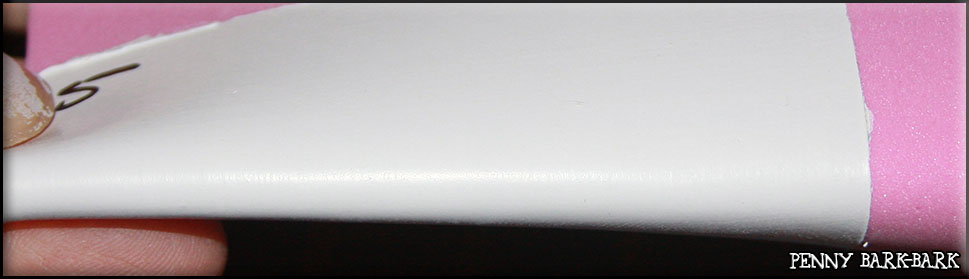
No cracking, crumple test was the same, but no peeling.
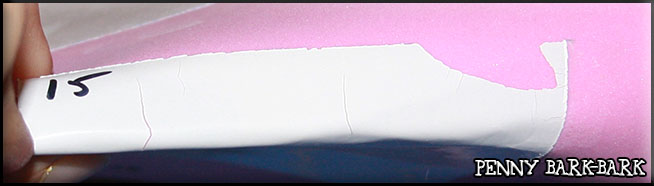
15. Adhesion Promoter (3 layers), PVA/Latex mix (4 layers) then Vinyl and Fabric spray paint.
Cracking, big chunks peeled with masking tape removal and same results on the crumple test.
Conclusion, 10, 11 & 14 are the best with 14 really winning because of the peeling on masking tape removal, now if we can dial in the latex mix like I did the first time around we might have found another go-to mix!
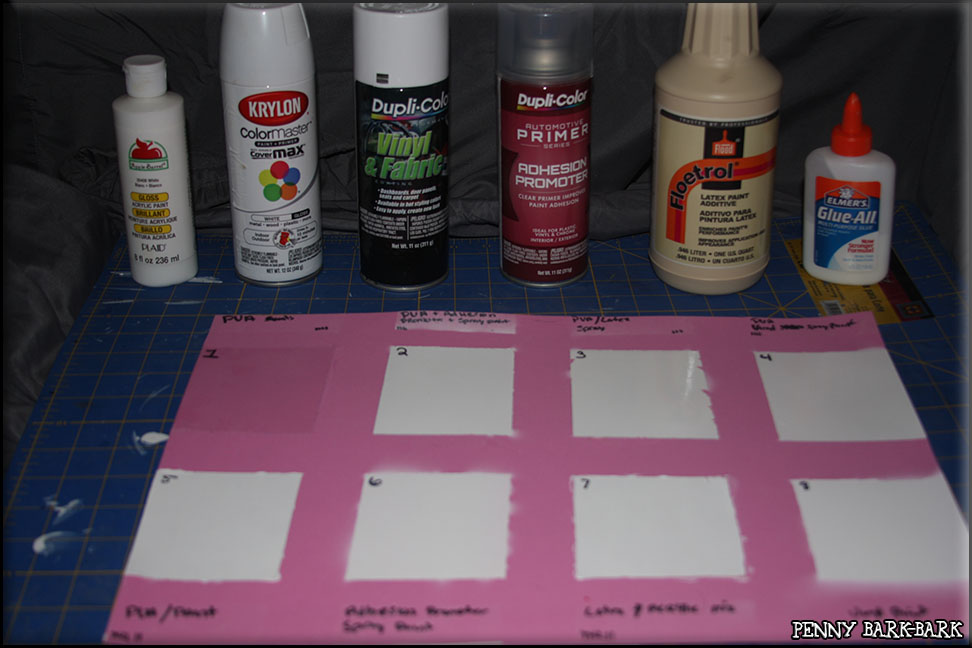
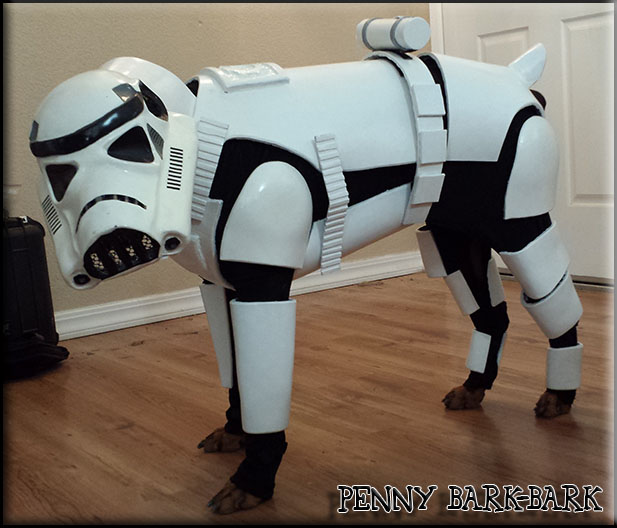
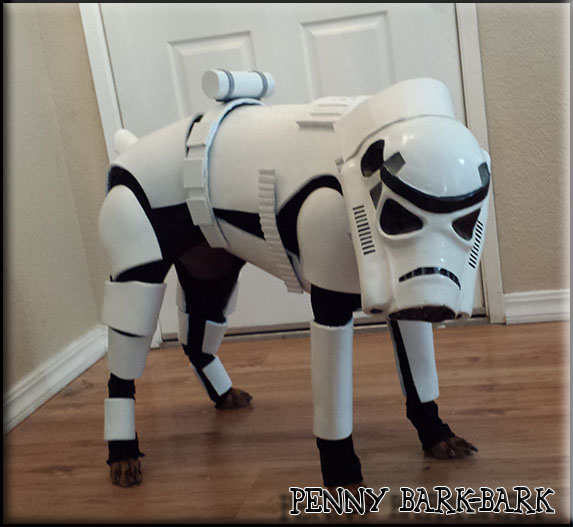
When it comes to Doggie Cosplay the most important component is a patient dog (like me!) then second most important component is flexibility of your costume. Us pups are wiggly and we bend in ways you wouldn’t believe. If you choose to work with craft/EVA foam one of the biggest problems you are going to have is painting the foam. A quick Google search will tell you when you paint craft foam you have to seal it first otherwise you will never get complete coverage. A lot of people figure after you seal it then you can just spray paint it for a nice even finish, which is great if your foam will never flex but the moment it does you will have cracks ruining all of your hard work (barking from experience!).
After learning this lesson the hard way we have took the time to put together a test of different formulations. If you have done your research you will find people mainly use two methods to seal foam, watered down PVA (white Elmer’s glue) or Mod Podge. For this test we only bothered with PVA because we read a lot of complaints about Mod Podge cracking.
Here is our painted panel before any flex test along with the products we used.
Description of each square
1. PVA glue watered down (5 layers).
2. PVA glue watered down (5 layers), followed by 3 layers of Adhesion Promoter, then 4 layers of Krylon spray paint.
3. Mix of PVA with Latex Additive (3 layers), followed by 4 layers of Krylon spray paint.
4. PVA glue watered down (5 layers), followed by 5 layers of Vinyl and Fabric spray paint.
5. PVA/Paint mix not watered down.
6. Adhesion Promoter (3 layers), followed by Krylon spray paint.
7. Acrylic paint with latex additive (7 layers).
8. Vinyl and Fabric spray paint (5 layers).
Results after folding each section in half then rolling this fold up and down. Then crumpling the whole thing.
1. PVA glue watered down (5 layers).
We did this just to see how PVA alone handled flexing. We did 5 layers based on the feel of the foam after each layer, we put on layers until we got a smooth finish that felt like the foam was sealed and ready for painting. After bending the foam in half, it cracked, not a good sign! After the crumple test it retained the crumple marks.
2. PVA glue watered down (5 layers), followed by 3 layers of Adhesion Promoter, then 4 layers of Krylon spray paint.
Big fail here, the fold test just cracked every which way. The finish on this was also very poor like it didn’t seal completely. A few more layers of PVA might have taken care of that issue, but with the cracking it’s not work another test.
Update 9/27/14, after painting the back side of the foam and testing that paint, #2 has become a crumbly mess.
3. Mix of PVA with Latex Additive (3 layers), followed by 4 layers of Krylon spray paint.
I have mixed feeling on this. The PVA with latex only took 3 layers and probably could have done with just two, however we didn’t bother feeling the finish until after the 3rd. After that PVA/latex the finish was VERY smooth and we knew this could make a beautiful finish. After the fold finish there were a few big cracks, but just in certain sections. Unlike the other sections that cracked folding different directions this only generated a few cracks. However the crumple test did leave some indents. I am wondering if the cracks are from areas that got a little less latex in the mix. I do think this formula will work for foam that flexes but not bends in half and just great for sealing foam that doesn’t bend. The only other down side I saw it when we peeled off the painters tape, if you look at the edges you can see some peeled. We might play more with this formula more.
4. PVA glue watered down (5 layers), followed by 5 layers of Vinyl and Fabric spray paint.
Fail again, lots of cracking and a pocked finish like it wasn’t seal. Enough said.
5. PVA/Paint mix not watered down.
This if our go-to, seal and color at the same time. No cracks at all, but the crumple test did leave some indents. The edges bled a little into the painters tape and a little peeled off with the tape. However right now this is still the go-to easy mix. I might try adding some latex to this mix to see if we get the perfect trio. If you use this mix and end up with crumple marks, it does fill in with a few more layers of the mix.
6. Adhesion Promoter (3 layers), followed by Krylon spray paint.
Speckled finish and lots of cracking (sounded like Rice Krispies during the tests), so fail.
7. Acrylic paint with latex additive (7 layers).
This is another good mix, but it has a couple downfalls. No cracking, no indents, however we had brush strokes and when we lifted the painters tape a big chunk of the paint wanted to peel off. This once again brings me back to what I said in #5 that I should try a mix of acrylic paint, latex, PVA and maybe even try watering it down a bit.
8. Vinyl and Fabric spray paint (5 layers).
No cracking, but shows indents after crumple. However this one is very speckled from not being sealed, however I do have to say it took color well. With the way it flexed we may also try to seal with PVA/Laxtex then using this as a top coat.
Update 9/27/14, after painting the back side of the foam and testing that paint, #8 like #2 has become a crumbly mess.
Conclusion
PVA is a must to allow the foam to take color. The best mix was #5, followed by #7 If possible also use a foam that is close to your final color just in case you do get cracking. with the best sealing coat being the PVA/Latex mix.
If anyone has any other mixes, let me know and I will see if I can test them. When I get around to testing a PVA/Latex/Acrylic mix and PVA/Latex with Vinyl/Fabric top coat samples I will go ahead and post an update.
Update 9/27/14 I did some more tests on the backside of this foam, here are the results.
I am going to keep this as short as possible. We by no means are experts and this was our first sculpt and cast of any sort so if you are looking for a detailed how-to I would suggest googling tutorials on the different subjects. By “we” I mean Mom, without opposable thumbs I had to leave the work to her while I barked orders over her shoulder.
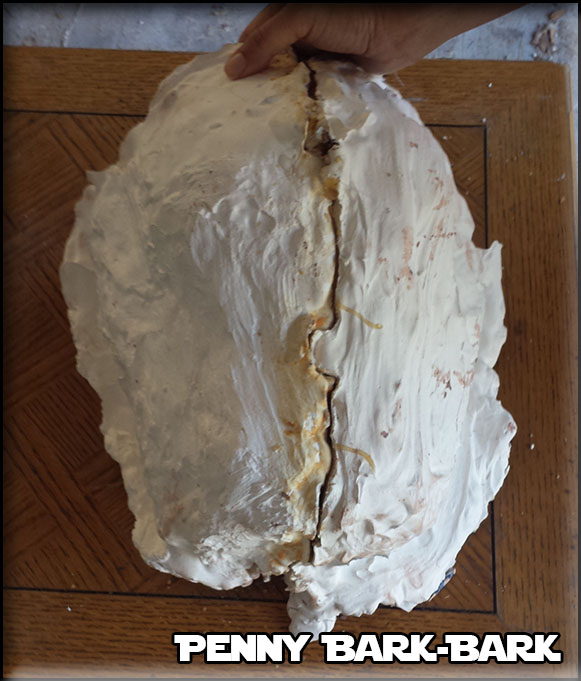
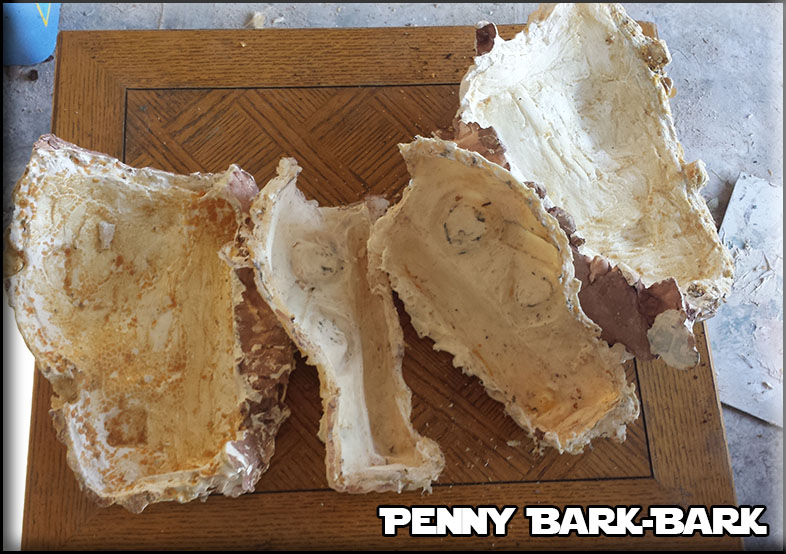
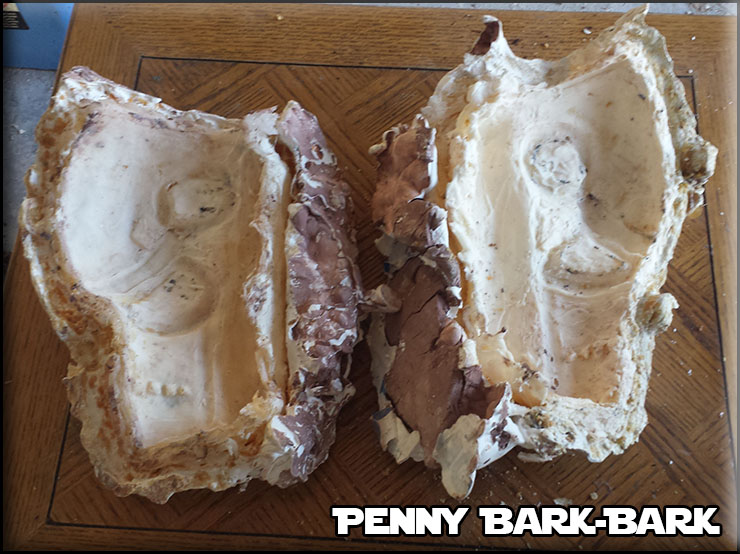
As much as we would have loved to use a modified pepakura build we knew with my long muzzle that wasn’t going to happen so we would have to do something custom. Lets start with the first and most important part to this build… ME!!! None of this could be done if I weren’t a very tolerant dog. I have been dressed up in one way or another since I came home as a little pup so this build was nothing new to me but most dogs will have a big issue with it. To start this build we had to start with a mold of my head. For this build Mom wrapped my head in a nice thick soft towel (eyes and all) then used fiberglass casting material to cast the top half of my head. The towel not only protects me, it also allows extra room in the helmet to breath and add padding for adjustment and comfort (we planned on making it out of fiberglass), it’s better to have the helmet to big than too small. For the cast itself we used fiberglass casting material we bought off Amazon a while back for another project, this is the medial supply stuff made for broken bone casts. However we only used this since it was laying around and less messy, however we have also done a casting in a plaster and hemp strip mix (much like older humans casts) and this takes soooooo much longer to dry, is messy but supplies are easy to find local.
Sorry, no pics of the casting of my head.
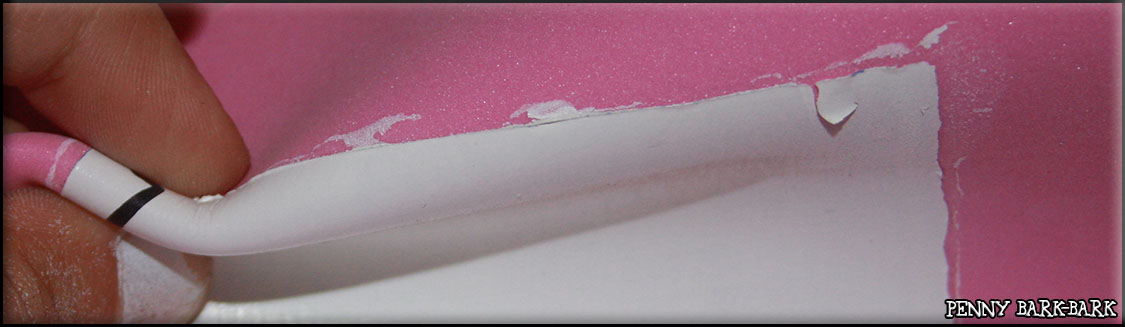
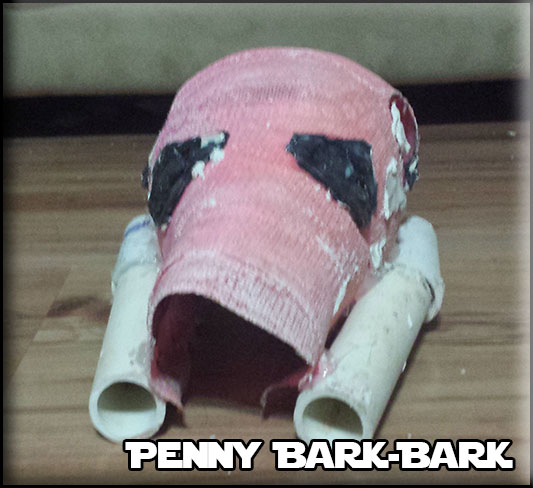
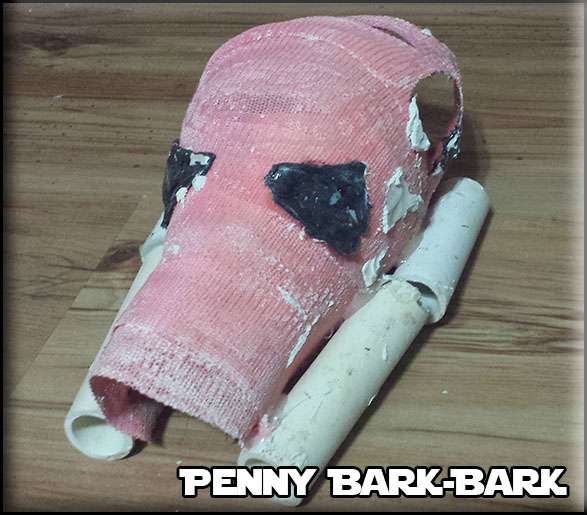
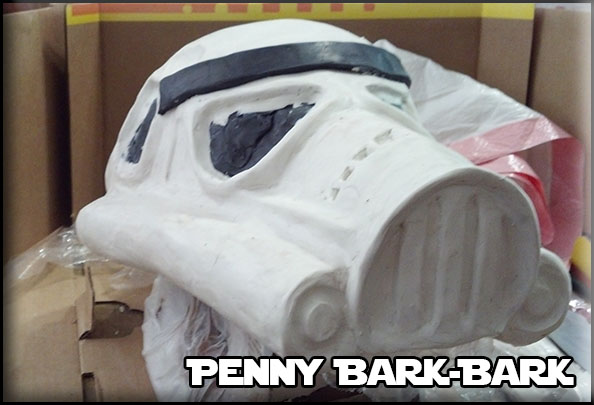
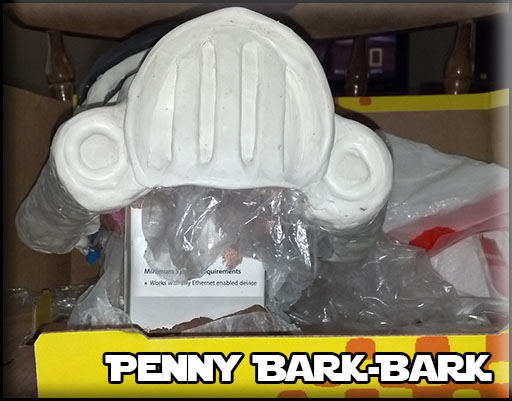
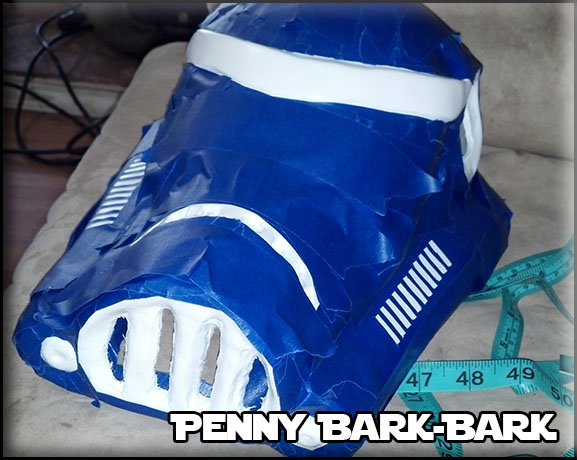
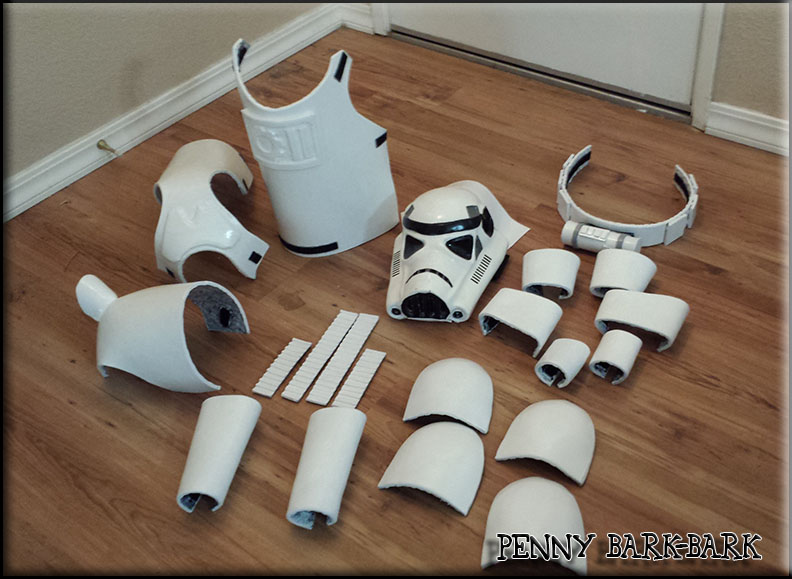
Now that we had my head shape, we cut out big holes for plenty of eye room and big ear holes. The pics below we taken after the complete build, so the black spots are still covered in clay. Next we wired PVC pipes to the side to give the helmet one of its be recognizable features of what appears to be part of the breathing unit.
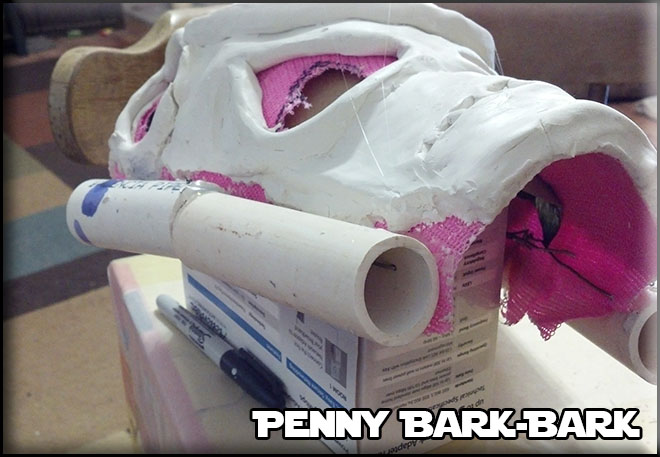
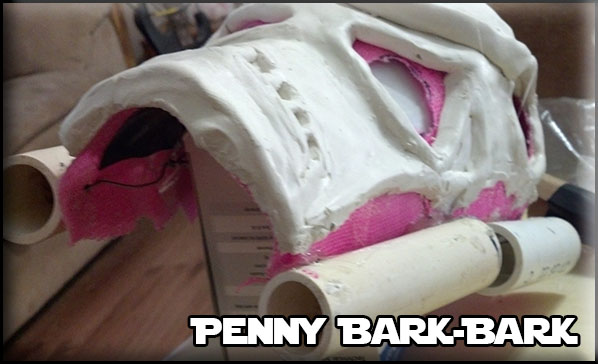
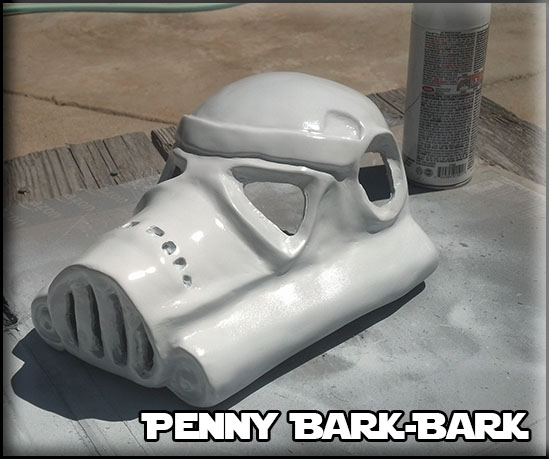
Next, the sculpt. Lets start by saying Mom never took art class (dang math nerd!) and is not artistic so she knew she was going to need a lot of time. Knowing this need for time we choose to use Original Sculpey Polymer Clay. Helpful hint.. get it at Wally World (Wal-Mart), its cheapest although you will have to check often because our local one here sells out fast. This clay stays pliable until you bake it giving you lots of working time. Below are pics of sculpt.
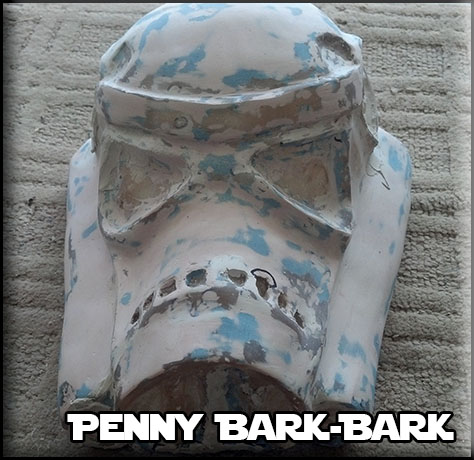
Once we got everything molded and ready for casting, Mom took it out to the garage and guess what DROPPED IT!!! Yes she DROPPED IT! Luckily the clay was so thick the damage was minimal, however you can notice a little bit on wonkiness in the final helmet which we think was the drop.
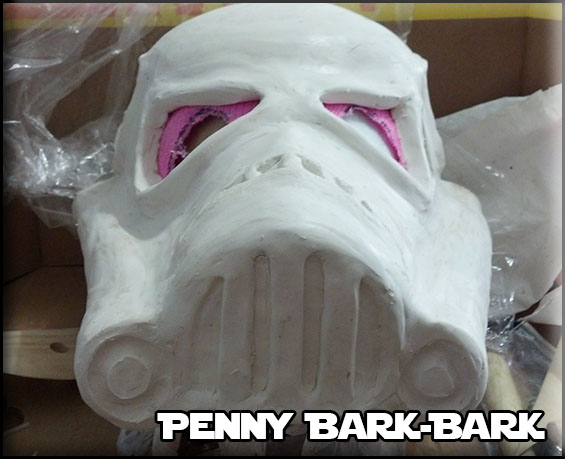
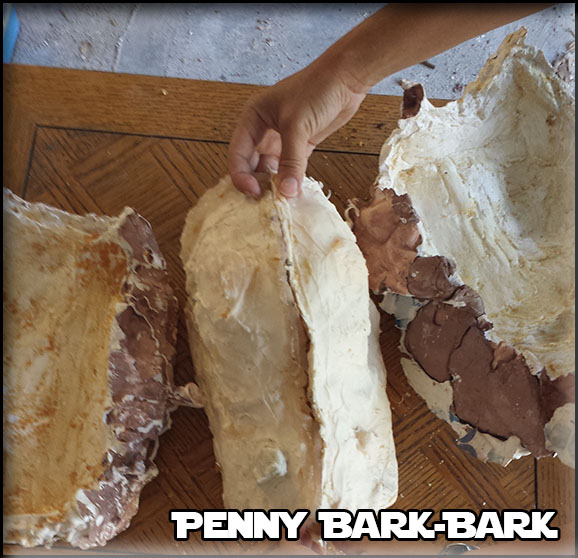
So now the casting process. We chose to use fiberglass as our helmet material. Why you ask? Only because Dad is a car guy so he is familiar with fiberglass and we didn’t want to build a vacuum forming system to use plastic (although we want one now!). So step one in this process for us was GOOGLE! We searched and searched on all different home casting techniques. One of the first rules we learned was if you are going to cast a hard material like fiberglass then you will was a soft mold like silicone. However here in Redding, CA you can’t find good silicone casting material so we looked for a good home made recipe. If you google Sugru or Oogoo substitute you will find a lot of good talks about them (add “cosplay” or “helmet” to your search). I went with a mixture 100% Silicone Caulking (clear), corn starch and orderless mineral spirits. The my mixture was approx 1:1:1 but I really suggest you spend the time googling people with more experience. I ended up making a two part mold from silicone followed by a 2 part mother mold made of plaster of paris.
Here is the mold post helmet, I am pretty sure it will not hold up to another pour, however since we did make our helmet from fiberglass I could make another mold using the helmet.
After we made the mold, next was the fiberglass, once again if you want details please look google experts. We used a polyester fiberglass which is the type you get at the auto parts store. When we pulled the mold, the fiberglass was pretty rough, it had lots of bubbles because the first few mixes of the silicone mix wasn’t as smooth as the last several (we learned as we went), but since this is another reason why we chose fiberglass, it can get fixed! We with the help of fillers like Bondo, fiberglass resin and A LOT of sanding by hand (no machines will work with this odd shape) we finally had it! This was the most time consuming part of the whole build because of all curves we couldn’t use any machines or blocks for sanding, it was all by hand.
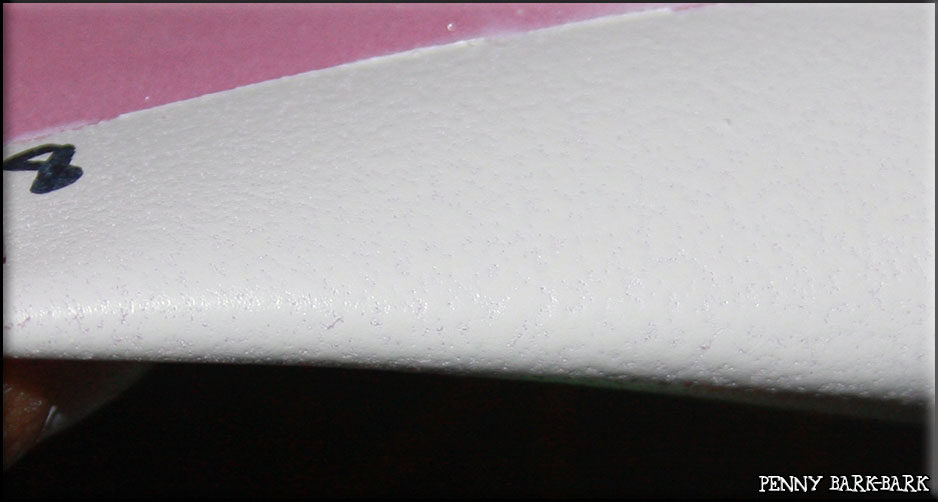
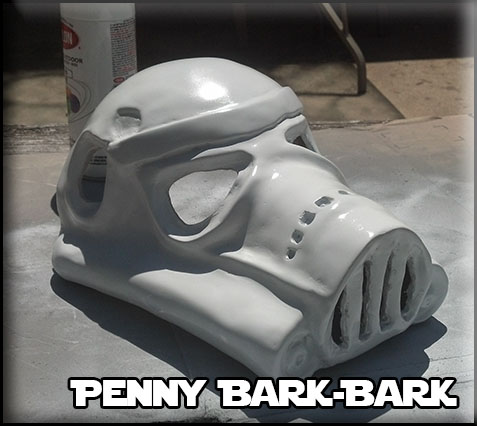
Next the paint, not much to say, we just used a filling primer, lots of wet sanding (all the way down to 2000 grit) and hi-gloss Krylon paint. The lenses are made from a car window tint on a clear plastic sheet, the kind that comes on reports people make, before you ask, no Mom did not steal this from work we found an old presentation Dad did that had the clear cover sheet. Although we thought about going with the dark green lenses like the actual movie props, trying to find that color tint would have been difficult and lets face it, most people think the lenses are black.
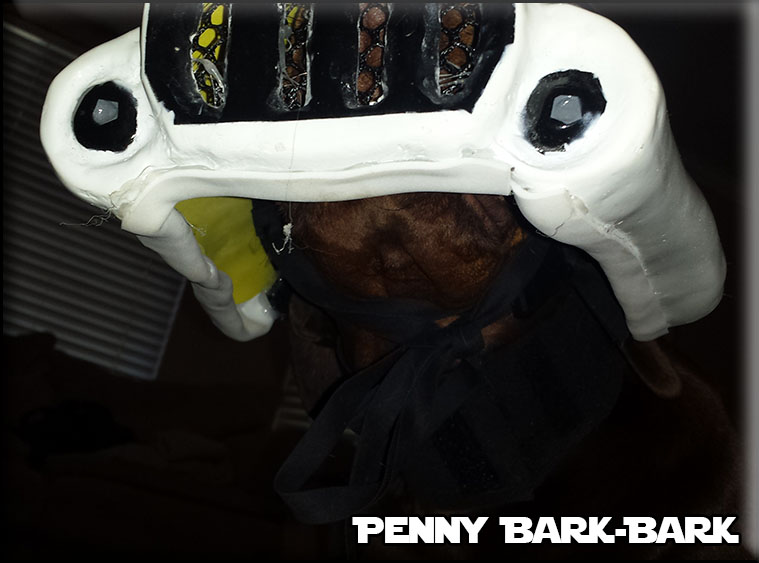
Finally how its strapped on. On the interior we put on foam padding for spacers and an additional layer of craft foam for final padding. We then added loops made of bias tape (folded fabric strips) so we could loop our straps made of bias tape throw. There are enough loops to make two straps that tie under my neck. However these two straps were not enough because if I dropped my head it would slide forward. So we got a 4 inch wide band of elastic that goes around my neck then a few of helmets loops then are tied back into this elastic neck piece. It is a bit of a mess of straps, but it works!
Sorry I haven’t updated this page in a while, it’s because we have been working on our Halloween costume and it is finally done! Although we are still working on Big Brother Trey’s costume.
This was Mom’s first build of this type. The body is EVA foam so I can move around and helmet is fiberglass, Mom’s first ever sculpt and cast. I’ll try to come back and post more detail and of the trial and errors on this costume later.