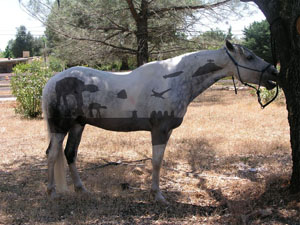
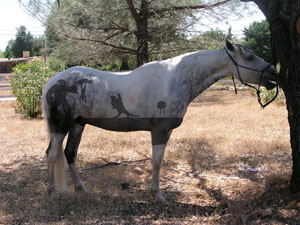
Body Shaving with Flare!
Tools:
Click on picture to enlarge
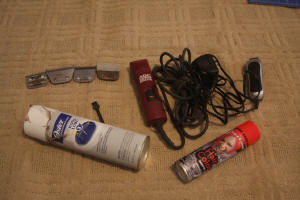
Good Quality Clippers w/SHARP size 10 blades -- It is good to have at
least two blades so you can alternate if one gets hot. I personally have 4
different blades. I love my Andis AGC Super clippers, they use
the same blades as Oster A5. I know a lot of people with age old Oster A5s
that seem like they will never die, I didn't have that same luck with my
original Osters which gave out on my first ever body shave. Another thing
to remember is to get your
blades sharpened before starting, I take mind to a local dog grooming store
where they change $5 a blade, well worth it! I sharpen every year
sometimes twice a year if my horse was really dirty during a shave and dulled
the blades.
Small trimmer (optional) --- If you plan on doing intricate parts (designs
such as stars and hearts don't need them). In the past I have used Wahl's
Pocket Pro clippers, however they only lasted about 1 year. This year I
got another Wahl's Mini Pro clippers from Kmart, I like them better than the
pocket pro because the are plug in, cordless just don't seem to do so well.
Clipper Blade Lube -- With this large of a job you need to
constantly lube your blades it will also help to keep them cool. I lube
every time I alternate blades or clippers.
Clipper Blade Brush -- Your clippers are going to get clogged with
hair, I brush them every time I switch blades. \I will also cheat and blow
them out with the air compressor.
Spray on Halloween Hair Color -- Right after Halloween I normally
head out to the dollar stores and buy up a big supply. One can lasted me
through this example below, there was still a bit left in the can after I
finished. However you never know you want to write on your horse so why
not stock up.
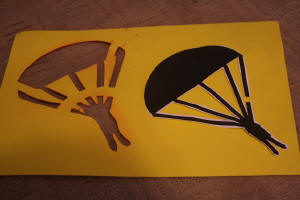
Stencils -- If you can find ready made stencils scoop them up!
Personally every year I had to make my stencils. The advantage to making
your own stencils is that you will have both the normal stencil and the
"opposite" stencil to help you work on details. CLICK HERE
TO LEARN HOW I MADE MY STENCILS
Tips
CLOTHING -- Prepare to be in a HAIR HURRICANE or the
HAIRICANE! Wear
tight fitting clothing or at least a shirt that has a nice tight fitting
neck. Ladies I strongly suggest you do not wear a bra with lace,
even with a tight fitting collar hair gets down there and loves to embed
in your bra (ahh ITCHY!!!) Also make sure your clothing is not the
type to get horse hair weaved into it (i.e. a knit sweater). I
personally prefer to wear jeans that fit over boots that are slip on or
zipper up, no laces for hairs to get embedded in. Pull your hair
back or wear a hat to help keep the same amount of hair on your head you
started with. Lastly when you are done with the HAIRICANE you will
most likely want to strip down before going in your house or car so if
you are at a stable bring a FULL (bra included) change of clothing and a
garbage bag to put your clothes in. If you are at home I
normally strip down in our laundry room, dump the clothes in the washer
and head right to the shower.
HORSE PREP -- Wash your horse the day before (or a few
days before) and blanket before shaving. Luckily here in California I
can get away with bathing in early winter, but even then I do a quick
wash just to get the areas I plan to clip a bit cleaner to keep the dirt
from dulling my blades then I keep my horse blanketed until I shave.
TIME -- Be prepare to spend a weekend shaving. Don't plan
on shaving right before an event, I like to give the horse at least 1 to
2 weeks before an event to give me time for touch ups and more hair
growth (hides clipper marks). The design below only took me about 3
hours with a couple breaks, however my horse loves to be shaved (even
tries to assist and lean into blades at times) and I have been doing it a few years.
It make
take a first timer much longer especially with a first time horse.
Also I normally do an initial shave one day, then go back and touch up
the next day when I have fresh eyes. Another thing I do it plan on
completing one side at a time then take a break but plan on taking
several breaks with a youngster.
PATTERN -- For your first time start with something
simple and limited. I suggest you keep it just to a spot on the
rump and keep the stencil something simple like a star, heart, or other
simple shapes.
Shaving
Caution: This first step usually requires assistance only because the
sound and feel of the Halloween hair color spray can freak some horses out, so
use caution, even my horse who puts up with gun fire always takes a little
getting used to this sound/feel.
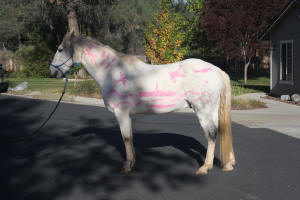
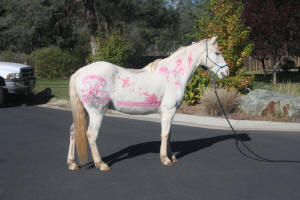
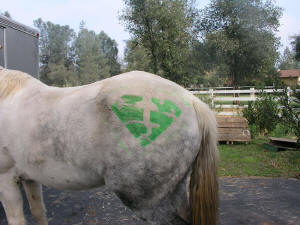
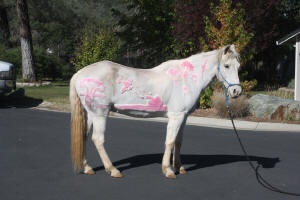
1. Put your stencil up against your horse and use the Halloween hair color
to fill in the stencil. If you are doing a full body design I
suggest you do some preplanning by mocking up a picture of your horse in a
graphic program. Also do not do any designs in your saddle tree area, it
could be uncomfortable when you cinch your saddle to have that uneven spot. Since I ride both english and western in 3 different saddles I normally
steer clear of that area.
I also only mark up one side of the horse at a time. After I do my initial
clipping on one side I take a break then start painting the other side.
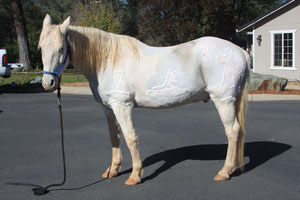
Click on picture to enlarge
2. Use the large clippers to clip all the areas you are not putting a
design on, leave at least 4 inches around your painted area. I personally leave
the legs area, the sheath and occasionally the face unshaved. Remember
to ALWAYS clip against the direction of the hair (this may be a challenge in the
flank area just watch the hairs). Try to use long strokes if possible with
the clippers.
In areas like the throat latch you may need to get your horse to turn their head
the other way to stretch the skin and get a nice tight shave. REMEMBER, frequently feel the top of your blades to make sure they are not getting hot, if
they do switch blades or skip down to step 3 then back when they are cool.
Also remember to lube your blades!
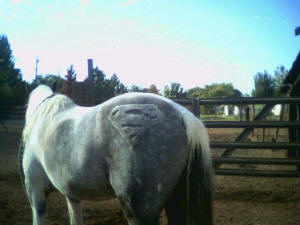
3. Cutting the design is going to be the biggest challenge, especially if
your horse has really long hair or is a moving target. Cutting around your design and keeping
the original size is an art but I will try to explain my technique. If you have small
trimmers this is the time to use them. If your design in on part of the
horse where the hair is flowing from the left to the right then prepare to start on the
right side of the design. Turn the clippers over so the teeth are pointing
down on the horse, then cut down on the hair on the right edge of the design and
move the blades down then out away from the design. You don't have to go far, you
are just creating a nice clean line. If you are using small trimmers I
normally don't like to use them like normal clippers since they clip the hair
much shorter than the size 10 blades on your larger clippers.
Now on the left side of the design you can NOT cut right along the edge of the
color, doing so will move that edge of the design in to the design
approximately the length of the
hair. So this side takes a little thinking, planning and experimenting on
your part.
I suggest you start cutting (holding the blades the way I explained above) about
2 inches out, when you cut see if any of the color comes off, if it does you are
cutting into your into your design. I normally start 2 inches out and work
my way in however my horse gets a really LONG and THICK coat, especially for
California (he was raised in South Dakota but after 4+ winters here he still
gets a really thick coat which is why I shave). Now the more intricate your
design the more you will need to experiment how to cut the design. That is
why I suggest if this is your first time then follow K.I.S.S. (Keep It Simple
Stupid).
Don't be surprised if you have to change your design along the way, you will
notice mine did a little bit, I had problem with my small paratrooper stencil so
I rearranged and also changed the water around on the other side.
4. When you have finished outlining the design I normally go back with my
big clippers and clip the hair between the non-painted area and the outline
created. Be sure the take several steps back and look at your horse to see
if you missed any areas.
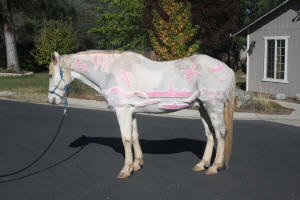
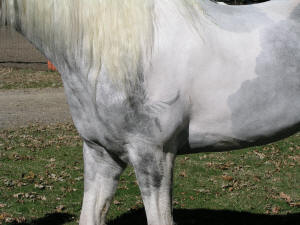
Now that you think you are done feel free to wash the paint off your
horse, then be prepared to go back the next day to do touch ups now that you
haven't been staring at your horse for hours. I always find clipper marks
or bits of hair I missed, I also use this opportunity to clean up the design.
If you find you have clipper marks run your clippers back over the spot going
against the grain, you may even need to stretch the skin but as long as your
clippers are sharp they should remove the marks.
Click on picture to enlarge
After Care -- Depending on your local climate your horse will need to be blanketed, the thickness and if you need a hood will depend on your
weather. Here during early winter and early spring I can get away with a
stable blanket overnight and nothing during the day (unless stormy then I go
waterproof). In the middle or winter I will go with a medium waterproof
blanket but still no hood and my horse is pastured all the time. Although
this year I am going to experiment with a light blanket with neck attachment. You
should consult with someone that is local and experience body shaving to see
what blankets they use.
Touch Ups -- You may have to touch up every 1 to 1.5 months
depending on your horse. If you touch up soon enough you won't have to
break back out the stencils.
Winter 2009 - 2010
WWII Theme
Click on picture to enlarge


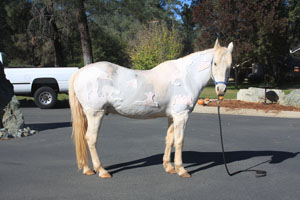
Winter 2013 - 2014
Star Wars Hoth Planet Theme
Click on picture to enlarge
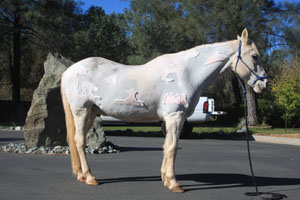
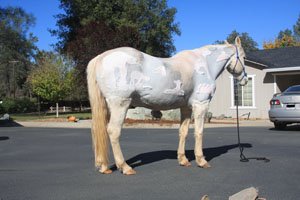
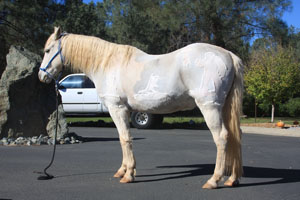
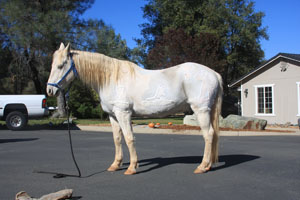
Concept Photoshops for Hoth Planet Theme
Click on picture to enlarge
